Purpose of this guide
This guide is for teachers and professionals who work with students with visual impairments. It highlights some common challenges these students may face and suggests adaptations and practical advice.
Visit the webinar video recording to access an introduction to this guide.
There are separate guides focusing on working with students with fine motor and mobility challenges and with deafness and hearing loss.
We welcome contributions to help us cover more scenarios or solutions. Send your thoughts, ideas, and comments to us at accessibility@microbit.org. We are hoping the community will help ensure this guide is accurate and stays relevant.
Common challenges
This section lists common challenges faced by students with visual impairments when using the BBC micro:bit. Each challenge links to suggested workarounds detailed in the guidance section.
Getting to know the BBC micro:bit
Getting to know the BBC micro:bit
Sound as an alternative output
Sound as an alternative output
Difficulties seeing the LED output
Difficulties seeing the LED output
Including tactile and hands-on learning
Including tactile and hands-on learning
Coding with a screen reader
Coding with a screen reader
Using MakeCode by sight, with adaptations
Using MakeCode by sight, with adaptations
Tasks requiring sighted support
Tasks requiring sighted support
Specific guidance
Physical hardware adaptations
Brighter or clearer visual output
Some people may find it hard to make sense of the shapes made by the LEDs on the micro:bit due to the brightness and spacing between the LEDs. Some micro:bit cases cover the LED matrix with a semi-translucent cover, which creates a slight diffusion effect, for example the Black Frosted Case for micro:bit V2. One user solved this problem with a custom built diffuser, as described in Improving the micro:bit LED display.
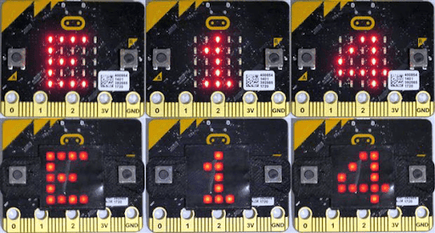
dougw, Improving the micro:bit LED display
If students cannot see the micro:bit’s LEDs and want brighter, larger scale visual output, there are many display accessories available with much brighter and more colourful LEDs.
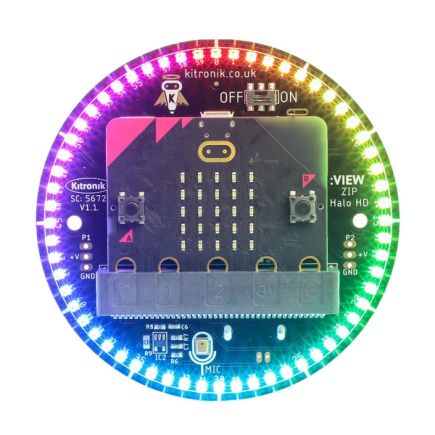
Kiktronik, ZIP Halo HD
Environmental conditions affecting LED visibility
The LED display on the micro:bit can be difficult to see clearly when used outdoors on a sunny day. Consider temporarily shading the micro:bit using a clipboard or similar, or get students to make a DIY enclosure for better visibility.

When batteries are running low, the brightness of the LEDs can reduce significantly. Keep this in mind when you are working with students with low vision, and consider running from USB power if possible or ensuring fresh batteries are available.
Sound output options
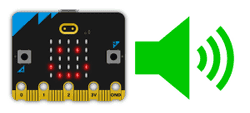
Both the micro:bit V1 and V2 allow you to connect headphones or a speaker for sound output. The micro:bit V2 also features a built-in speaker, so you can add sound effects without any additional hardware.
Most Microsoft MakeCode music blocks work with both versions, but some blocks (found in the “micro:bit V2” group at the bottom of the Music category) only work with the V2. This Frère Jacques project is an example of a sound-based project suitable for both the micro:bit V1 and V2.
When using headphones or a speaker with a micro:bit V2, you may want to add a ‘set built-in speaker: OFF’ block to your program to prevent sound coming from both the built-in speaker and your connected audio device.
Use a USB connection for transferring programs
You can transfer code to the micro:bit using a USB cable on a PC, Chromebook or Android device. This can be more accessible to a user with a visual impairment than Bluetooth pairing. See Transfer code to the micro:bit for more information. Unfortunately, it is not possible to transfer code from an Apple (iOS) device via USB cable to the micro:bit.
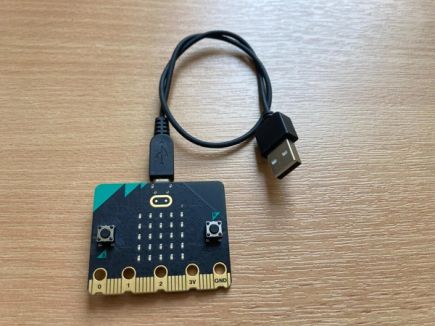
Many teachers provide micro:bits to students with USB cables already attached, to minimise any challenges with plugging into the small micro-USB port on the micro:bit board. This also helps with orienting the device correctly, and quickly identifying the A and B buttons. It can be helpful to use a 50cm to 1m long USB A to USB Micro B cable for additional freedom of movement.
Diagnose a micro:bit error using a computer
If something goes wrong with the micro:bit it may enter a panic routine. It reports this with a sad face and an error code scrolls on the LED display. This is not directly accessible to a student who cannot read the error code on the screen, but if you plug in the micro:bit to a computer, it will show up as a drive in your file system. Navigate to the MICRO:BIT drive and you will find a text file called FAIL.TXT or ASSERT.TXT, which will include text information about the error.
Accessing coding
Start with cut-out cards
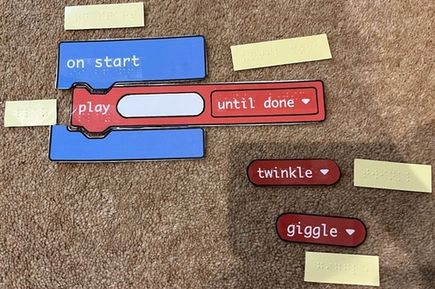
Many teachers find it helpful to start with micro:bit MakeCode blocks cut-out cards before students use computers for coding. This resource includes commonly-used MakeCode blocks such as those used in First lessons with MakeCode and the micro:bit.
For students with visual impairments, you can attach printed blocks to stiff card or rubber shelf paper and optionally add braille labels - you can see examples of this in Pauline Maas’ unplugged blocks in different languages. This can also support students with visual impairments working together with sighted peers to plan their programs before coding them in MakeCode.
Unplugged activities
Many coding concepts can be introduced with hands-on problem solving in the classroom before moving to working at a computer.
For example, movement-based activities like Red light, green light teach conditionals through physical actions, while paper-based design exercises like Decision boxes help students plan algorithms using flowcharts. Interactive games like What’s your function & crazy conditionals introduce and explore the concept of functions. There are many such unplugged activities suggested throughout micro:bit lesson plans, as well as lessons shared by third parties.
For coding in an unplugged environment, you may want to use cut-out cards.
Use Microsoft MakeCode editor with a screen reader
As of summer 2026, the Microsoft MakeCode editor has screen reader support, including the blocks editor. There are skip links at the start of the page to jump straight into the code. For the best experience, we recommend enabling Screen Reader Mode in the settings, which adds additional audio cues for block nesting and scope. For more guidance on using a screen reader to introduce coding with blocks, see Microsoft MakeCode screen reader support.
Note that a keyboard is required. We recommend using a desktop or laptop computer, as screen reader support on mobile devices has not been fully tested and may not work reliably. There are also some limitations of screen reader access to the simulator - there are known issues with the compass heading control, and no accessible readout of the LED state.
Please share feedback using our Feedback form – accessibility in Microsoft MakeCode for the micro:bit and related resources.
Using keyboard controls in MakeCode
Keyboard controls are available in MakeCode for navigation and access to MakeCode blocks. For further information including a video guide, keyboard shortcuts and FAQs, see Microsoft MakeCode keyboard navigation.
Customise MakeCode’s visual appearance
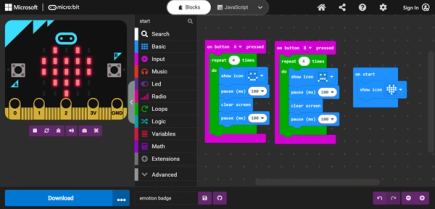
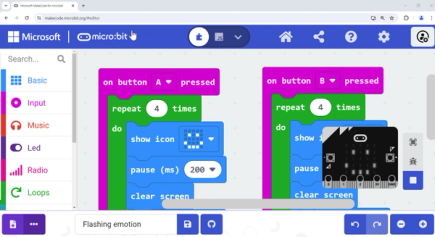
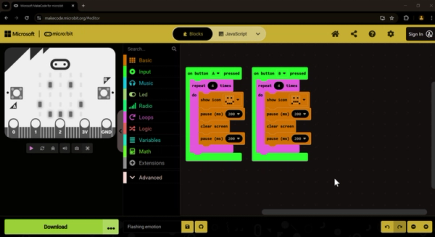
MakeCode offers several built-in options to customise the editor’s appearance to improve visibility and readability. These include adjustable zoom levels, high contrast and dark themes, and a flexible layout. These adaptations may help any student who finds small text hard to read, experiences visual fatigue, struggles with visual distractions, or has a condition such as dyslexia or Irlen syndrome that affect reading on screen.
For instructions on using these features and visual examples, see our detailed guide: MakeCode visual options. For additional customisation, you can also use your computer’s colour filter settings.
Work with a fullscreen simulator
The simulator in the Microsoft MakeCode editor can be expanded to fill the whole screen. This lets students view their program’s results at a much larger scale than on the physical micro:bit. This also allows individuals to use their computer’s accessibility settings (for example, high contrast or colour filters) to more clearly see the state of the LEDs visually. Note that the LED display output is not accessible to a screen reader .
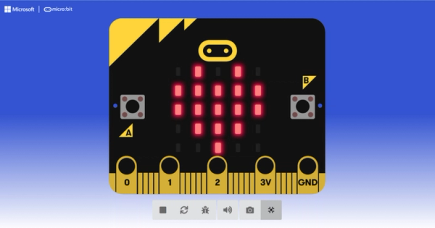
Use your browser in fullscreen mode
On some laptops, especially Chromebooks, the amount of screen area available to show a webpage can be limited. You can significantly increase your coding space by using fullscreen mode:
Chromebook: Press the “fullscreen” key on your keyboard
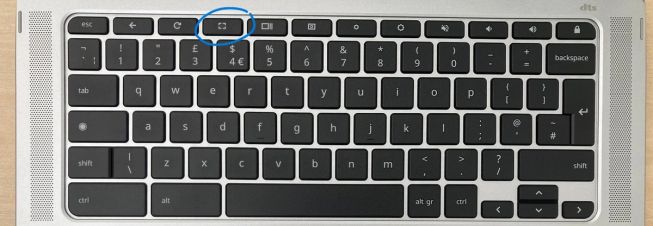
Windows: Press F11
Mac: Press Fn + F (macOS Monterey 2021 or later) or Ctrl + Cmd + F (older macOS versions)
This removes the address bar, bookmarks, and other browser elements, giving you maximum screen space for coding.
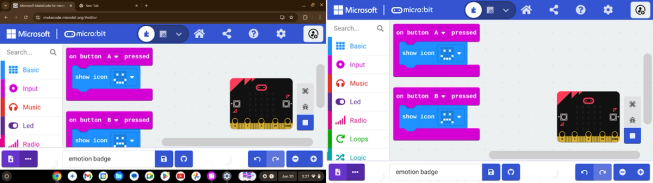
Navigating around larger programs
When programs become longer, it can be difficult to navigate around the code.
MakeCode has the ability to “format” your code, which tidies up the blocks and makes sure they do not overlap each other. You can access this by right-clicking on the workspace and selecting “Format Code” or pressing F when the workspace or code blocks are focused.
You can also collapse blocks that have other blocks inside them, for example an ‘if’ logic block or an event block like ‘on start’.
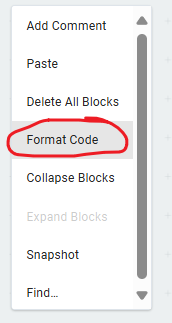
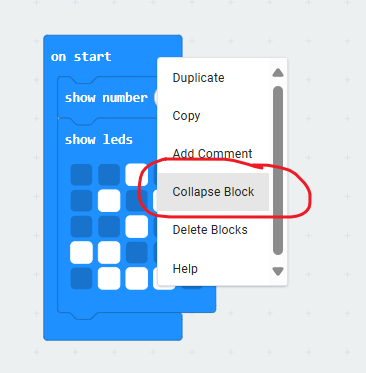
You can also search for blocks in your code, by using Ctrl + F (Windows) or Cmd + F (Mac) and typing part of a block name. This will jump you straight to the matching block in your program.
Adapting projects
Adding sound output to an existing project
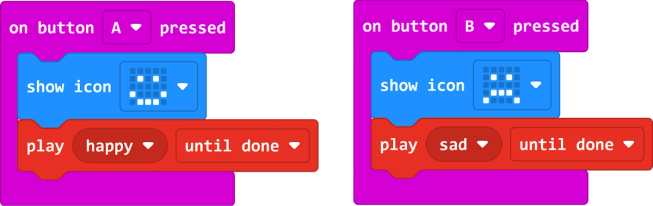
If a project only features LED output, you can add additional audio output by including a code block from the Music category in the toolbox. For example, the emotion badge project usually has visual output, but you may choose to add ‘play happy’ and ‘play sad’ blocks as shown in the following picture.
Related links
- TapeBlocks - Creative Circuit Making for All have been used with learners with visual impairments to explore electronic circuits, and are compatible with the micro:bit.
- Teen uses micro:bit to allow visually impaired to share texts
- Beginner text tour of the micro:bit (short introductory audio description with transcription of the micro:bit) or the Full text tour of the micro:bit.
- Inclusive projects with sounds and images may be valuable for students with visual impairments.
- micro:bit tactile diagram
Third party content
This document includes links to third party content. We have included these as examples of products or resources that may be useful. However, the Micro:bit Educational Foundation does not have any official link to these products.
Contribute your feedback
We welcome contributions to help us cover more scenarios or solutions. Send your thoughts, ideas, and comments to us at accessibility@microbit.org. We are hoping the community will help ensure this guide is accurate and stays relevant.