Make an AI sports data logger with micro:bit CreateAI that logs how much time you and others spend running, walking and being still.
Step by step project guide
Step 1: Understand it
How does it work?
In this project, you’ll train a machine learning (ML) model to recognise when you’re running, walking and being still.
You’ll combine that model with a MakeCode program that uses the micro:bit’s data logging function to record what action you are doing every second.
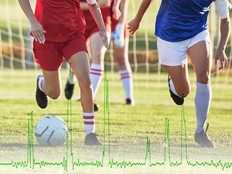
This project could be useful in sports such as football or netball where you need to analyse how active certain players are. You could also use it to monitor how much time you have spent running or walking during school breaks or a during a workout.
What is machine learning?
Machine learning (ML) is a kind of artificial intelligence (AI) where computers can learn from and make decisions based on data.
ML models are trained by humans to help them make those decisions, for example, to recognise different ‘actions’ when you move your micro:bit in different ways.
What will I need to do?
AI systems need humans to design, build, test and use them. You'll collect data to train an ML model, test it, improve it, and combine it with computer code to make a smart device that uses AI. You'll use a micro:bit and the micro:bit CreateAI website to do this.
Step 2: Create it
What you need
- A micro:bit V2, USB cable, and a battery pack with 2 x AAA batteries
- A computer (e.g. desktop, laptop, or Chromebook) with access to the micro:bit CreateAI website, using a Chrome or Edge web browser
- If your computer does not have Bluetooth enabled, you’ll need an extra micro:bit V2
- A strap and holder, or another way to attach the micro:bit to your wrist (e.g. flexible craft stems or elastic bands)
- You may also find our micro:bit CreateAI teaching tips useful
Collect data samples
When you open the project in micro:bit CreateAI, you’ll see we’ve given you some data samples for ‘running’, 'walking’ and ‘still’ actions:
walking
running
still
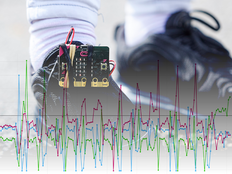
You can add your own movement samples using the micro:bit's movement sensor or accelerometer.
In micro:bit CreateAI, click the 'Connect' button to connect your data collection micro:bit and follow the instructions.
Attach the data collection micro:bit to your left wrist like a watch, with the logo at the top. Click on the first action, ‘walking’, and click 'Record' to record your own data samples. If you make a mistake, you can delete any samples you don’t want. You can also press button B on the micro:bit to start recording.
If you would like to record continuously for 10 seconds to get 10 samples, click on the three dots next to the record button and select that option.
Now record your own data samples for the ‘running’ action, then the ‘still’ action, making sure for ‘still’ that you collect samples in different positions, such as facing up and down.
Train and test the model
Click the ‘Train model’ button to train the model, then test it. Try walking and see if ‘walking’ is the estimated action, then running to see if ‘running’ is the estimated action. Keep still and see if ‘still’ is estimated. Give your micro:bit to someone else to wear (making sure they put it on the same wrist and in the same orientation) and see if it works as well for them.
Improve your model
Most models can be improved with more data. If the model needs improving, click on ‘← Edit data samples’.
You can delete any data samples which you think don’t fit or add more samples from yourself and other people.
Train the model again, and test it again.
Put the model and code on your micro:bit
In micro:bit CreateAI click on ‘Edit in MakeCode’ to see the project code in the MakeCode editor.
You can modify the code or just try it out as it is. Attach your micro:bit using a USB cable, click on the ‘Download’ button in the MakeCode screen, and follow the instructions to transfer your AI model and the code blocks to it.
Attach a battery pack to the micro:bit and put it on, ready to test out.
Collect your data
First press buttons A and B together to delete any old data logs from your micro:bit. Reset the timer by pressing the reset button on the back of the micro:bit. Press button A to start logging and button B to stop logging.
Your data will stay on your micro:bit even if you disconnect the battery or press the reset button.
Analyse your data
Disconnect the battery pack and plug the micro:bit back into a computer. The micro:bit appears like a USB drive called MICROBIT. Look in the MICROBIT drive and open the MY_DATA file to see a table of your data in a web browser:
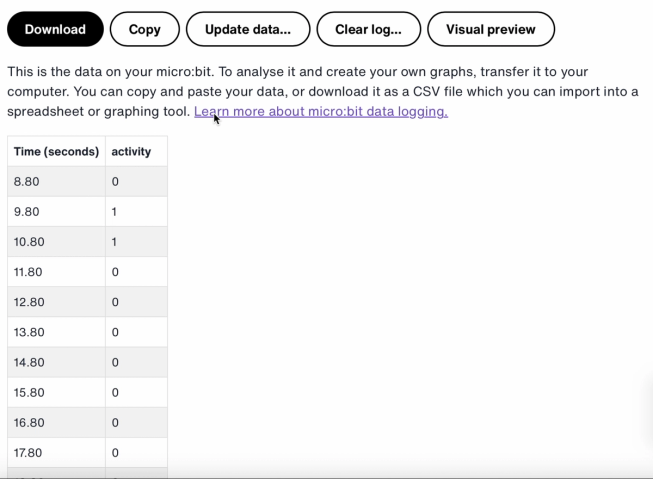
The time stamps in the log represent the amount of time that has passed since your micro:bit was powered on or reset.
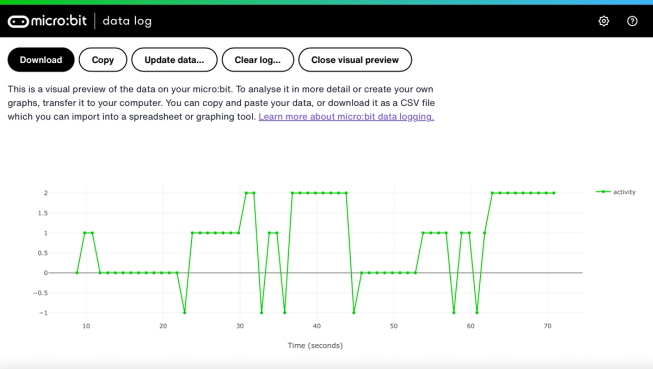
Click on Visual preview to see a graph of your data:
You can also click on the Copy button and then paste your data into a spreadsheet.
How the code blocks work
This program uses a variable called ‘logging’. A variable in a computer program is a container for storing data which can be accessed and updated while the program is running. In this program, the variable ‘logging’ controls if the micro:bit is logging or not and can be set to ‘true’ or ‘false’. Variables that can be set to these two values are called ‘Boolean’ variables.
When the program starts, the variable ‘logging’ is set to false. A show icon block is used to display a ‘no’ icon on the LED display to indicate the micro:bit is not logging. The set columns and set timestamp blocks create labels for the data logging table your micro:bit will produce.
The on button A pressed block is used to set logging to ‘true’ and show a ‘yes’ icon on the LED display. The on button B pressed block is used to set logging to ‘false’ and show a ‘no’ icon on the LED display. And the on buttons A + B pressed block sets logging to ‘false’, displays a skull icon, and deletes any log.
Finally, an ‘every’ block is used to check every 1,000 milliseconds or second if the micro:bit is logging. If it is, an ‘if then else’ block is used with ‘is ML detected’ and ‘log data’ blocks to record a 0 if you are still, a 1 if you are walking and a 2 if you are running in your data logging table. If the micro:bit cannot detect what you are doing, it records a -1 in the table. Bigger numbers are used for more active actions, so the resulting data logging graph gives you a clear visual record of how active you have been.
Evaluation
How accurate is the AI sports logger in tracking your movements? How could you improve its accuracy? Who would find this device particularly useful? How does it compare to the Step counter or the Movement data logger projects?
Step 3: Extend it
- Add a fourth action such as ‘throwing’ for sports like netball or tennis.
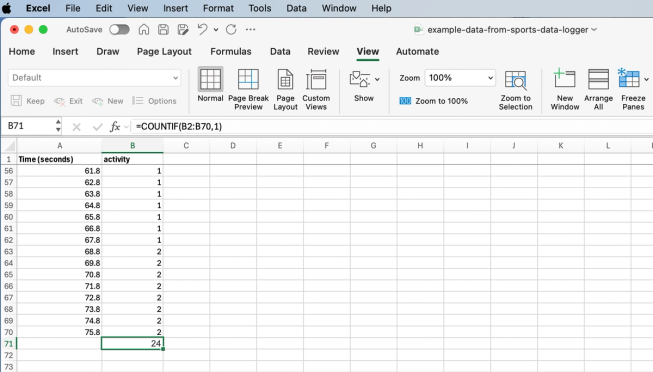
Excel spreadsheet with formula to count certain activity cells
- Add up how much time you spent on each activity. You could do this saving your data as a CSV file, opening it in a spreadsheet and using a formula such as =COUNTIF(B2:B70,1) Where B2:B70 is the range of the activity cells, and 1 is the activity number meaning ‘walking’.