MakeCode tactile cut-out blocks
Files
Start sound tactile cut-out blocks colour PDF
Start sound tactile cut-out blocks bw PDF
Doorbell tactile cut-out blocks colour PDF
Doorbell tactile cut-out blocks bw PDF
Shake alarm tactile cut-out blocks colour PDF
Shake alarm tactile cut-out blocks bw PDF
Mood music tactile cut-out blocks colour PDF
Mood music tactile cut-out blocks bw PDF
Tactile toolbox key PDF
Use these tactile Microsoft MakeCode for micro:bit coding blocks with the Getting started with screen reader activities for MakeCode for micro:bit. Each activity has specific guidance for using tactile resources to introduce concepts.
These programs provide an alternative to the MakeCode completed tactile programs and MakeCode text programs.
You will need
- Standard printer, swell paper, and tactile graphics machine
- Adhesive magnet sheets, approximately 0.5mm to 0.8mm
- Alternative: card and glue
- Scissors, craft knife or craft cutter
- Optional: Large magnetic board, A3 or Ledger
Prepare
MakeCode blocks
Print out the blocks for the activities you are using.
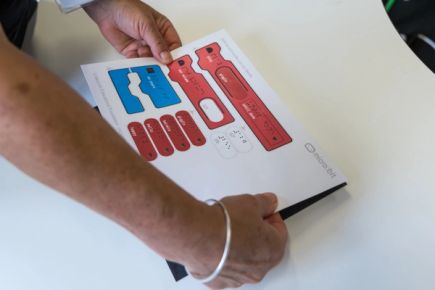
- Print the blocks on swell paper in colour or black and white.
Important: do not scale the print settings. - Feed the printed paper through a tactile graphics machine. When heated, the black areas and braille dots will rise while coloured areas stay flat.
- Stick the blocks onto magnet sheets or card. Magnets are heavier and harder to accidentally knock out of place or off a table, and they can be used with a magnet board.
- Cut out the blocks as indicated by the cut lines.
Alternatives:
- Print or stick on card and then cut out and add small magnets to the back.
- Use the editable files below and print without braille, cover with clear adhesive plastic for durability, and stick on clear braille labels.
MakeCode tactile toolbox key
Print out one copy of the tactile toolbox key and reuse it across all activities.
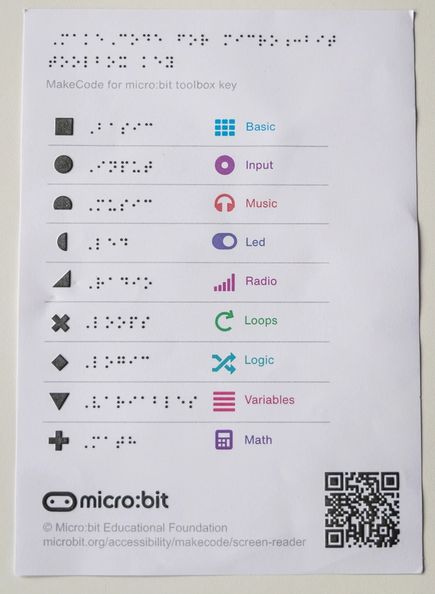
- Print the blocks on swell paper in colour or black and white.
- Feed the printed paper through a tactile graphics machine. When heated, the black areas and braille dots will rise while the coloured areas stay flat.
The key does not need cutting out.
Use
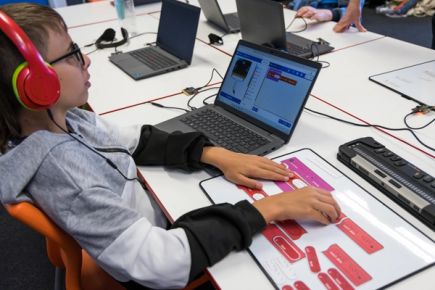
Use the tactile blocks to introduce braille users to coding with MakeCode as part of Activities 3-6 in Getting started with screen reader activities for MakeCode for micro:bit.
Magnet-backed blocks can be arranged on a magnet board. This can be used to provide a lesson resource such as a program prior to modifying or creating it in MakeCode, or as a resource that students can reference when working in the MakeCode editor.
Each block has a tactile icon corresponding to its toolbox category in MakeCode. The MakeCode tactile toolbox key can be used to look up the icons. The icons provide an alternative to the use of colour.
Container blocks, such as ‘on start’ or ‘repeat’ have a matching end which you can move to add more blocks inside. In MakeCode, the end gets added automatically.
Editing the resources
To modify labels or translate the text, use the editable files. The folder contains both colour and black-and-white versions.
You will need to install Swell Braille font (free) on your computer in order for the braille font to be visible on the design file.