Primeiro passo: o projeto
O que é?
Toque músicas diferentes usando o sensor de toque do micro:bit.
Estes dois vídeos mostram o que você fará e como desenvolver o código:
Introdução
Código
Como funciona:
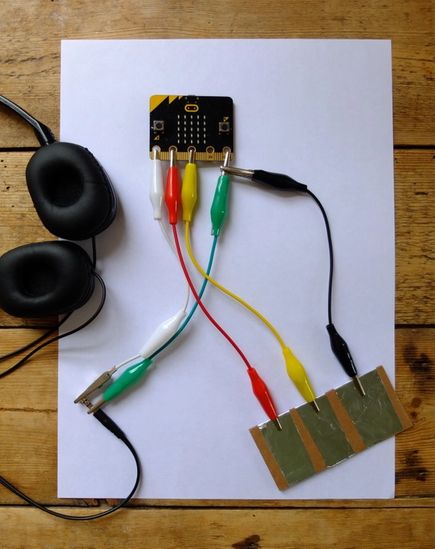
- Este projeto é igual ao projeto Jukebox, mas, em vez de usar os botões do micro:bit, você criará seu próprio dispositivo de entrada usando papelão coberto com tiras de papel alumínio conectadas por clipes de crocodilo aos pinos do micro:bit.
- Instale o programa em seu micro:bit.
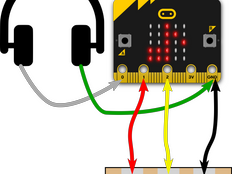
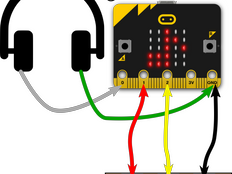
- Conecte uma extremidade de três cabos de clipe de crocodilo aos pinos 1, 2 e GND (pino de aterramento ou terra). Prenda as outras extremidades em um violão ou teclado feito de papelão.
- Com um dedo, toque a folha conectada ao GND e, com outro dedo, toque a folha conectada ao pino 1 e, em seguida, ao pino 2. Ele deve tocar uma melodia diferente, dependendo do pedaço de papel-alumínio que você tocar.
- O micro:bit está usando os pinos 1 e 2 como entradas de toque . Quando você toca em qualquer um desses pinos e no pino GND, você está completando um circuito elétrico. Uma pequena quantidade de eletricidade flui através de você, o micro:bit pode detectá-la, e o programa aciona a reprodução de uma melodia.
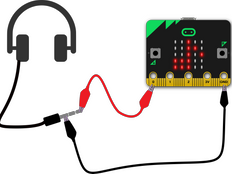
- Se você não tiver um micro:bit V2 que reproduza som, conecte um fone de ouvido aos pinos 0 e GND.

Itens necessários:
- Um micro:bit e um conjunto de baterias (opcional);
- Editor MakeCode ou Python;
- três cabos de clipe de crocodilo
- papelão, papel alumínio, cola bastão e tesoura para fazer um violão ou teclado
- é opcional usar fones de ouvido, campainha ou alto-falante com dois cabos adicionais com clipes de jacaré, para usuários da versão V1.
Segundo passo: é hora de programar
Terceiro passo: vamos deixar o código ainda melhor
- Altere as melodias que são tocadas quando você toca a folha de alumínio.
- Programe suas próprias melodias.
- Mostre imagens, letras, números ou palavras diferentes, dependendo da melodia que você escolheu.
This content is published under a Creative Commons Attribution-ShareAlike 4.0 International (CC BY-SA 4.0) licence.


