Step 1: Make it
What is it?
Play different tunes by using the micro:bit’s touch sensor.
These two videos show you what you'll make and how to code it:
Introduction
Coding guide
How it works
- This project is the same as the Jukebox project but instead of using the micro:bit’s buttons, you’ll make your own input device using cardboard covered in strips of tin foil connected by crocodile clip leads to the micro:bit's pins.
- Flash the program onto your micro:bit.
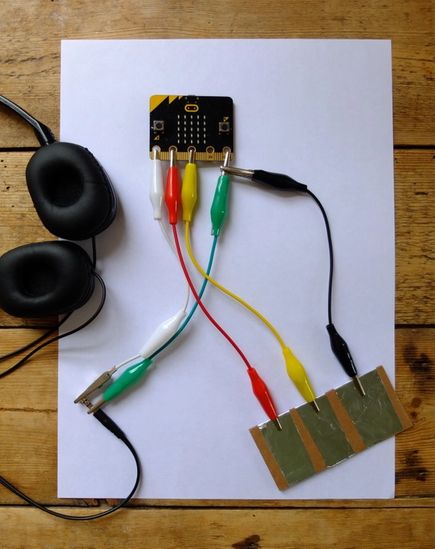
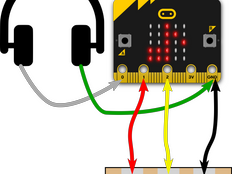
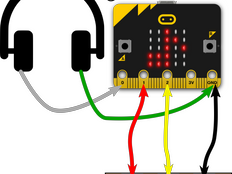
- Attach one end of three crocodile clip leads to pins 1, 2 and GND (ground or Earth pin). Attach the other ends to a cardboard guitar or keyboard.
- With one finger touch the foil connected to GND, and with another finger touch the foil connected to pin 1 and then pin 2. It should play a different tune depending on which strip of foil you touch.
- The micro:bit is using pins 1 and 2 as touch inputs. When you touch either of these pins and the GND pin, you’re completing an electrical circuit. A small amount of electricity flows through you, the micro:bit can detect it and the program triggers the playing of a tune.
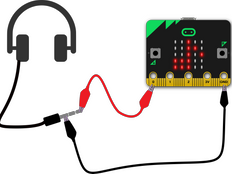
- If you do not have a V2 micro:bit, which plays sound, attach headphones to pins 0 and GND.

What you need
- micro:bit and optional battery pack
- MakeCode or Python editor
- three crocodile clip leads
- cardboard, tin foil, glue stick and scissors to make a guitar or keyboard
- optional headphones, buzzer, or speaker with additional two crocodile clip leads for V1 users
Step 2: Code it
Step 3: Improve it
- Change the tunes that are played when you touch the tin foil.
- Program your own tunes.
- Show different pictures, letters, numbers, or words depending on which tune you picked.
This content is published under a Creative Commons Attribution-ShareAlike 4.0 International (CC BY-SA 4.0) licence.


