Step 1: Make it
What is it?
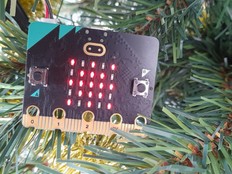
Make it snow on your micro:bit by shaking it, and press button A to hear a 'twinkle'.
What you'll learn
You will learn how to create an animation on the micro:bit’s LED display, how to use the micro:bit’s accelerometer to react to movement, and to play expressive sounds on your micro:bit. You will also find out how to use loops in a computer program.
How it works
- This program uses the micro:bit’s accelerometer input to sense when it’s shaken.
- When the accelerometer senses sudden movement, the program shows an animation of moving snow on the micro:bit’s LED display.
- An image of a chequerboard pattern and its inverse are shown in a sequence to create the illusion of movement.
- After showing each image, the program pauses for half a second (500 milliseconds) before showing the next image. This slows the animation down.
- The program uses a count-controlled loop to show the sequence of images ten times. Loops are also known as iteration.
- The snow globe uses the button A input to play the expressive sound ‘twinkle’.
- You will need a micro:bit V2 to play expressive sounds. If you have a micro:bit V1, you could just use the animation code. Or you could attach headphones and play music using the ‘play melody’ block instead. Using crocodile clip leads, connect micro:bit pin 0 to the tip of your headphone plug, and GND to the longer part of the headphone plug.
What you need
- a micro:bit
- MakeCode editor
- battery pack (optional)
Step 2: Code it
1# Imports go at the top
2from microbit import *
3
4
5while True:
6    if button_a.was_pressed():
7        audio.play(Sound.TWINKLE)
8    if accelerometer.was_gesture('shake'):
9        for i in range(10):
10            display.show(Image('90909:'
11                               '09090:'
12                               '90909:'
13                               '09090:'
14                               '90909'))
15            sleep(500)
16            display.show(Image('09090:'
17                               '90909:'
18                               '09090:'
19                               '90909:'
20                               '09090'))
21            sleep(500)
22        display.clear()
23Step 3: Improve it
- Use other inputs such as pressing button B to play festive tunes using the ‘play melody’ block. See the Frère Jacques loops project for how to do this.
- Make a more realistic animation of falling snow using several ‘show LED’ blocks.
- Adapt the Nightlight project to show moving snow on the LED display if it gets dark.
This content is published under a Creative Commons Attribution-ShareAlike 4.0 International (CC BY-SA 4.0) licence.


