The micro:bit Python Editor
Supporting students learning text-based coding with the BBC micro:bit
Why learn Python on the micro:bit?
Python is an excellent first text-based language to learn. Its instructions and syntax are based on natural language, making code easy to read, understand and modify.
As well as being widely used in education, it's used in industry, especially in the areas of data science and machine learning. Python is not just used by software developers, but also by people working in fields as diverse as medicine, physics and finance.
Python on the BBC micro:bit brings the benefits of physical computing to students aged 11-14, learning programming fundamentals through text-based coding: immersive, creative experiences for students that help build engagement and knowledge.

Features for education
Click on the headings below to discover some key features of the micro:bit Python Editor designed to overcome some common barriers, boost creativity and make the most of your coding time in class:
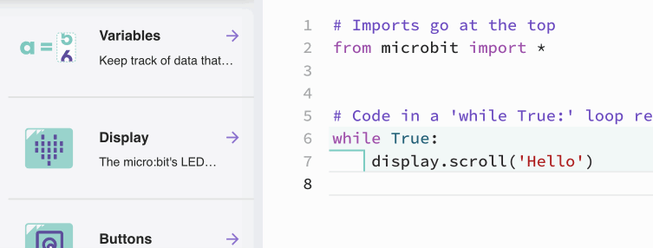
1. Reference
1. Reference
2. Drag and drop code snippets
2. Drag and drop code snippets
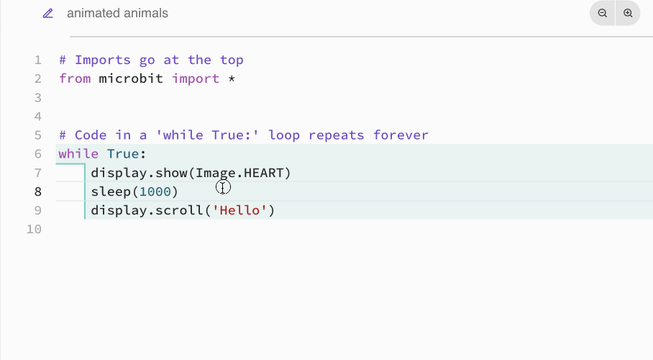
Students can drag working examples of code straight into the editor and test them out straight away. This saves time and helps overcome barriers caused by lack of keyboard skills and the need to remember precise syntax.
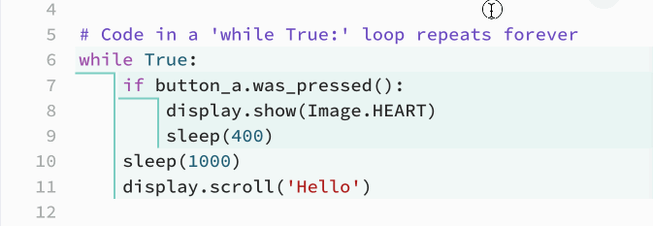
3. Code structure highlighting
3. Code structure highlighting
Blocks of colour show the structure of your students' Python programs, which helps with the design, planning and testing phases of their project. It's easier to understand the flow of a program when you can easily see which lines of code belong in a loop or 'if... then' statement, for example.
We know students new to Python can find indentations confusing, so clear lines help with debugging, making it easy to spot if code is not correctly aligned.
4. Error highlighting
4. Error highlighting
Errors are a normal part of coding. Symbols by the line number help you and your students identify bugs and fix them before sending code to a micro:bit. You can hover over the circle in the margin to see an explanation of the error.
5. Auto-complete
5. Auto-complete
Fear of a blank screen and not knowing what to type are two of the biggest barriers to starting text-based coding.
So, as you type, the editor makes suggestions which you can pick by clicking or pressing the enter key. This saves time, saves typing errors and saves students having to remember precise syntax.
It's also another way of discovering what Python and the micro:bit can do, for example by seeing more options for built-in images.
6. Simulator
6. Simulator
Students can test their code out using the simulator before sending it to a real micro:bit.
This helps them develop, test, debug and evaluate their code and means they can work on projects even when they don't have access to a micro:bit device.

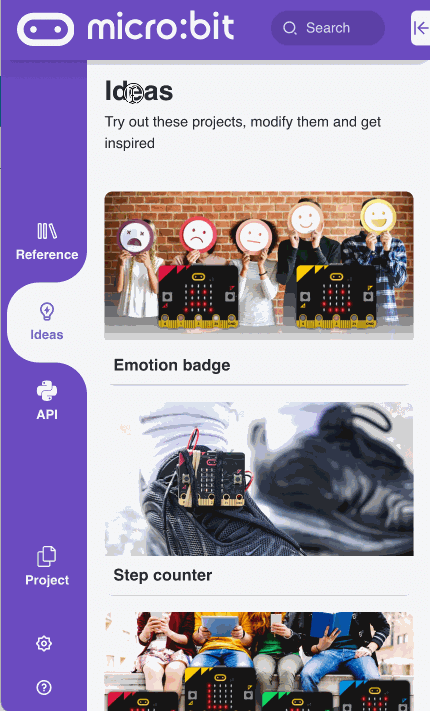
7. Ideas
7. Ideas
Don't forget to explore the Ideas tab which contains complete working programs your students can use straight away, then modify to make their own. You'll find an emotion badge, step counter, radio, and sound projects.
Overcoming barriers to learning
Click on the headings below to explore how the micro:bit Python Editor is designed to overcome common barriers to engaging and making progress with text-based coding:
Fear of a blank screen
Fear of a blank screen
Discoverability for creativity
Discoverability for creativity
Keyboard skills and memory
Keyboard skills and memory
Aid iterative project design
Aid iterative project design
Understanding program structure
Understanding program structure
Supporting debugging
Supporting debugging
Making the most of precious time
Making the most of precious time
Technical requirements
You just need a web browser to load the editor. Once loaded, it will continue to work, even if your internet connection is lost. You can also install the editor as an app for offline use. Find out more in our support article Using the micro:bit editors offline.
The editor will work on any recent Windows, Mac or Chromebook computer.
If you want to send your code direct to your micro:bit, without downloading it as a HEX file first, you'll need to use Microsoft Edge or Google Chrome browsers. Click on 'Send to micro:bit' and follow the instructions on screen.
Saving work
Students can save their work locally, or in shared storage, as HEX project files which can be copied direct to a micro:bit or re-loaded in the editor. Code can also be saved as Python text files which can also be reloaded in the editor, either by dragging and dropping or using the 'Open' button.
You can also use the micro:bit Python Editor in live coding lessons in person, or remotely, using micro:bit classroom. This lets you save a whole class's code as one Word document and also as a file to resume work on the same projects at a later date. It's totally free of charge and no logins or passwords are needed.
Support for localisation
Although Python itself is in English, learning to code in text-based languages is made more accessible when students can read explanations and use a code editor with an interface in their own language.
The micro:bit Python editor's buttons, Reference content and Ideas projects have been translated into several languages including French, Spanish, Chinese, Japanese and Korean.
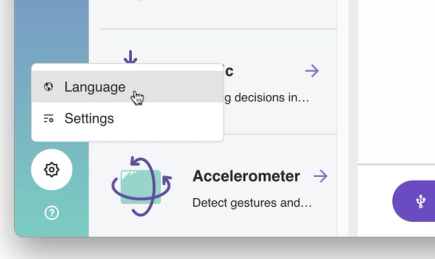
Click on the cog icon and then select 'Language':
Find out more
You can find more detailed information and videos about how to use the micro:bit Python Editor on our support site.
Try it out
Test the editor for yourself right now. Browse the Reference and Ideas sections and see how quickly you and your students get inspired.
This short video will help you get coding in Python in seconds: