micro:bit CreateAI
Explore AI through movement and machine learning
micro:bit CreateAI is a free, web-based tool that makes it easy for students to explore AI through movement and machine learning (ML).
You can use micro:bit CreateAI to train an ML model and then run it on your BBC micro:bit V2.
- Collect movement data from the micro:bit accelerometer
- Train an ML model to recognise patterns in the data
- Code the micro:bit to run ML models and take your creation anywhere
micro:bit CreateAI allows you to explore the vital role data plays in AI systems, and develop AI literacy. It also helps to consolidate computer science learning and skills of data literacy used in mathematics and science.
You can find tips for using CreateAI in your classroom in our Teaching tools page and learn about AI terms and language in our AI glossary.
Get started with micro:bit CreateAI by trying out our ready-made AI projects and watching our getting started video.
What is machine learning?
Machine learning (ML) is a type of AI where computers can learn from and make decisions based on data. It's widely used to power many kinds of technology, including smart fitness trackers and tagging photos with the names of your friends.
ML also works well in education because it can be simplified to work with small sets of data. This makes it ideal for classroom use with the micro:bit, allowing students to experience how ML works for themselves using personal movement data they gather from the micro:bit's accelerometer sensor.
Overview
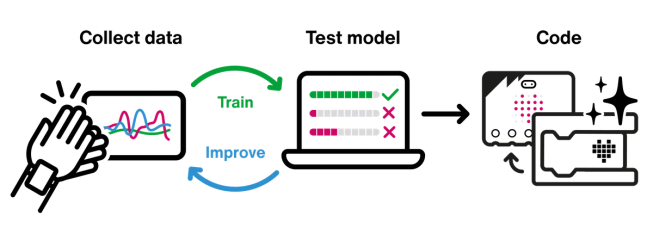
To use micro:bit CreateAI, you will typically follow these steps:
- Connect a micro:bit to the micro:bit CreateAI tool
- Collect movement data using the micro:bit
- Train and test the ML model
- Improve the ML model, re-train and re-test the model
- Use your ML model in a MakeCode program
- Download your MakeCode program and model to a micro:bit
- Optionally, save your CreateAI project for sharing or working on later
What you need
- A computer (desktop, laptop or Chromebook) with Chrome or Edge browser
- A micro:bit V2
- USB data cable
- Batteries and battery pack
- A strap and holder, or another way to attach the micro:bit to your wrist, ankle or another object
- If your student’s computer does not have Bluetooth enabled, you will need an extra micro:bit V2
For the best experience, we recommend students have some experience with the micro:bit and the MakeCode editor.
What’s not supported
- iPads, iOS or Android tablets or phones
- Using micro:bit CreateAI projects in micro:bit classroom
- Downloading your model and code to a micro:bit V1
What if I only have micro:bit V1?
You can use any version of the micro:bit to collect data, train and test an ML model, but you need the faster processor on the micro:bit V2 to code with ML in MakeCode and run the ML model on your micro:bit.
To use a V1 you will need to use Bluetooth. Radio link is not supported on V1.
For more information on requirements
If you need more technical information on computer hardware, operating system, browser and website access requirements, see our support guide.
Connect your micro:bit
To collect data to train your ML model, you need to connect a micro:bit to your computer. We call this micro:bit the data collection micro:bit. Because you’ll be collecting movement data, you will connect using a wireless connection. There are two ways to do this, Bluetooth and radio link.
Note: Some computers, especially in schools, may not have Bluetooth or it may be disabled permanently.
My computer has Bluetooth
You need one micro:bit and Bluetooth enabled on your computer to use a Bluetooth connection.

My computer does not have Bluetooth
You’ll need two micro:bits to make a radio link connection. A radio link micro:bit and a data collection micro:bit. The radio link micro:bit is connected to your computer by USB and receives data wirelessly from your data collection micro:bit.

Follow the on-screen instructions
micro:bit CreateAI will guide you through the best setup and connection process for your computer.
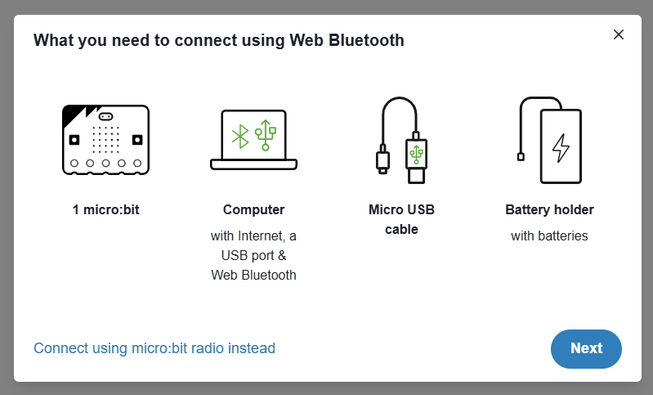
Note: The computers your students are using may not have Bluetooth, so they may see different instructions. You can demonstrate a radio link connection by selecting ‘Connect using micro:bit radio instead’.
Once connected, you are ready to record some data.
Record data samples
The data collection micro:bit uses its accelerometer to measure changes in movement in three dimensions: x, y and z. It sends the data wirelessly to micro:bit CreateAI.
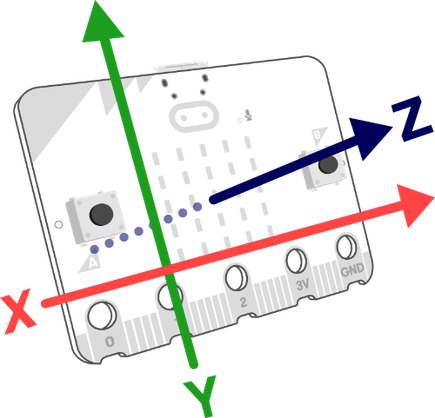
micro:bit CreateAI shows this data in a live graph that responds in real time to the movements of your micro:bit.

Now it’s time to record some data that you will use to train your ML model. To collect your movement data follow these steps:
Step 1: Hold your data collection micro:bit
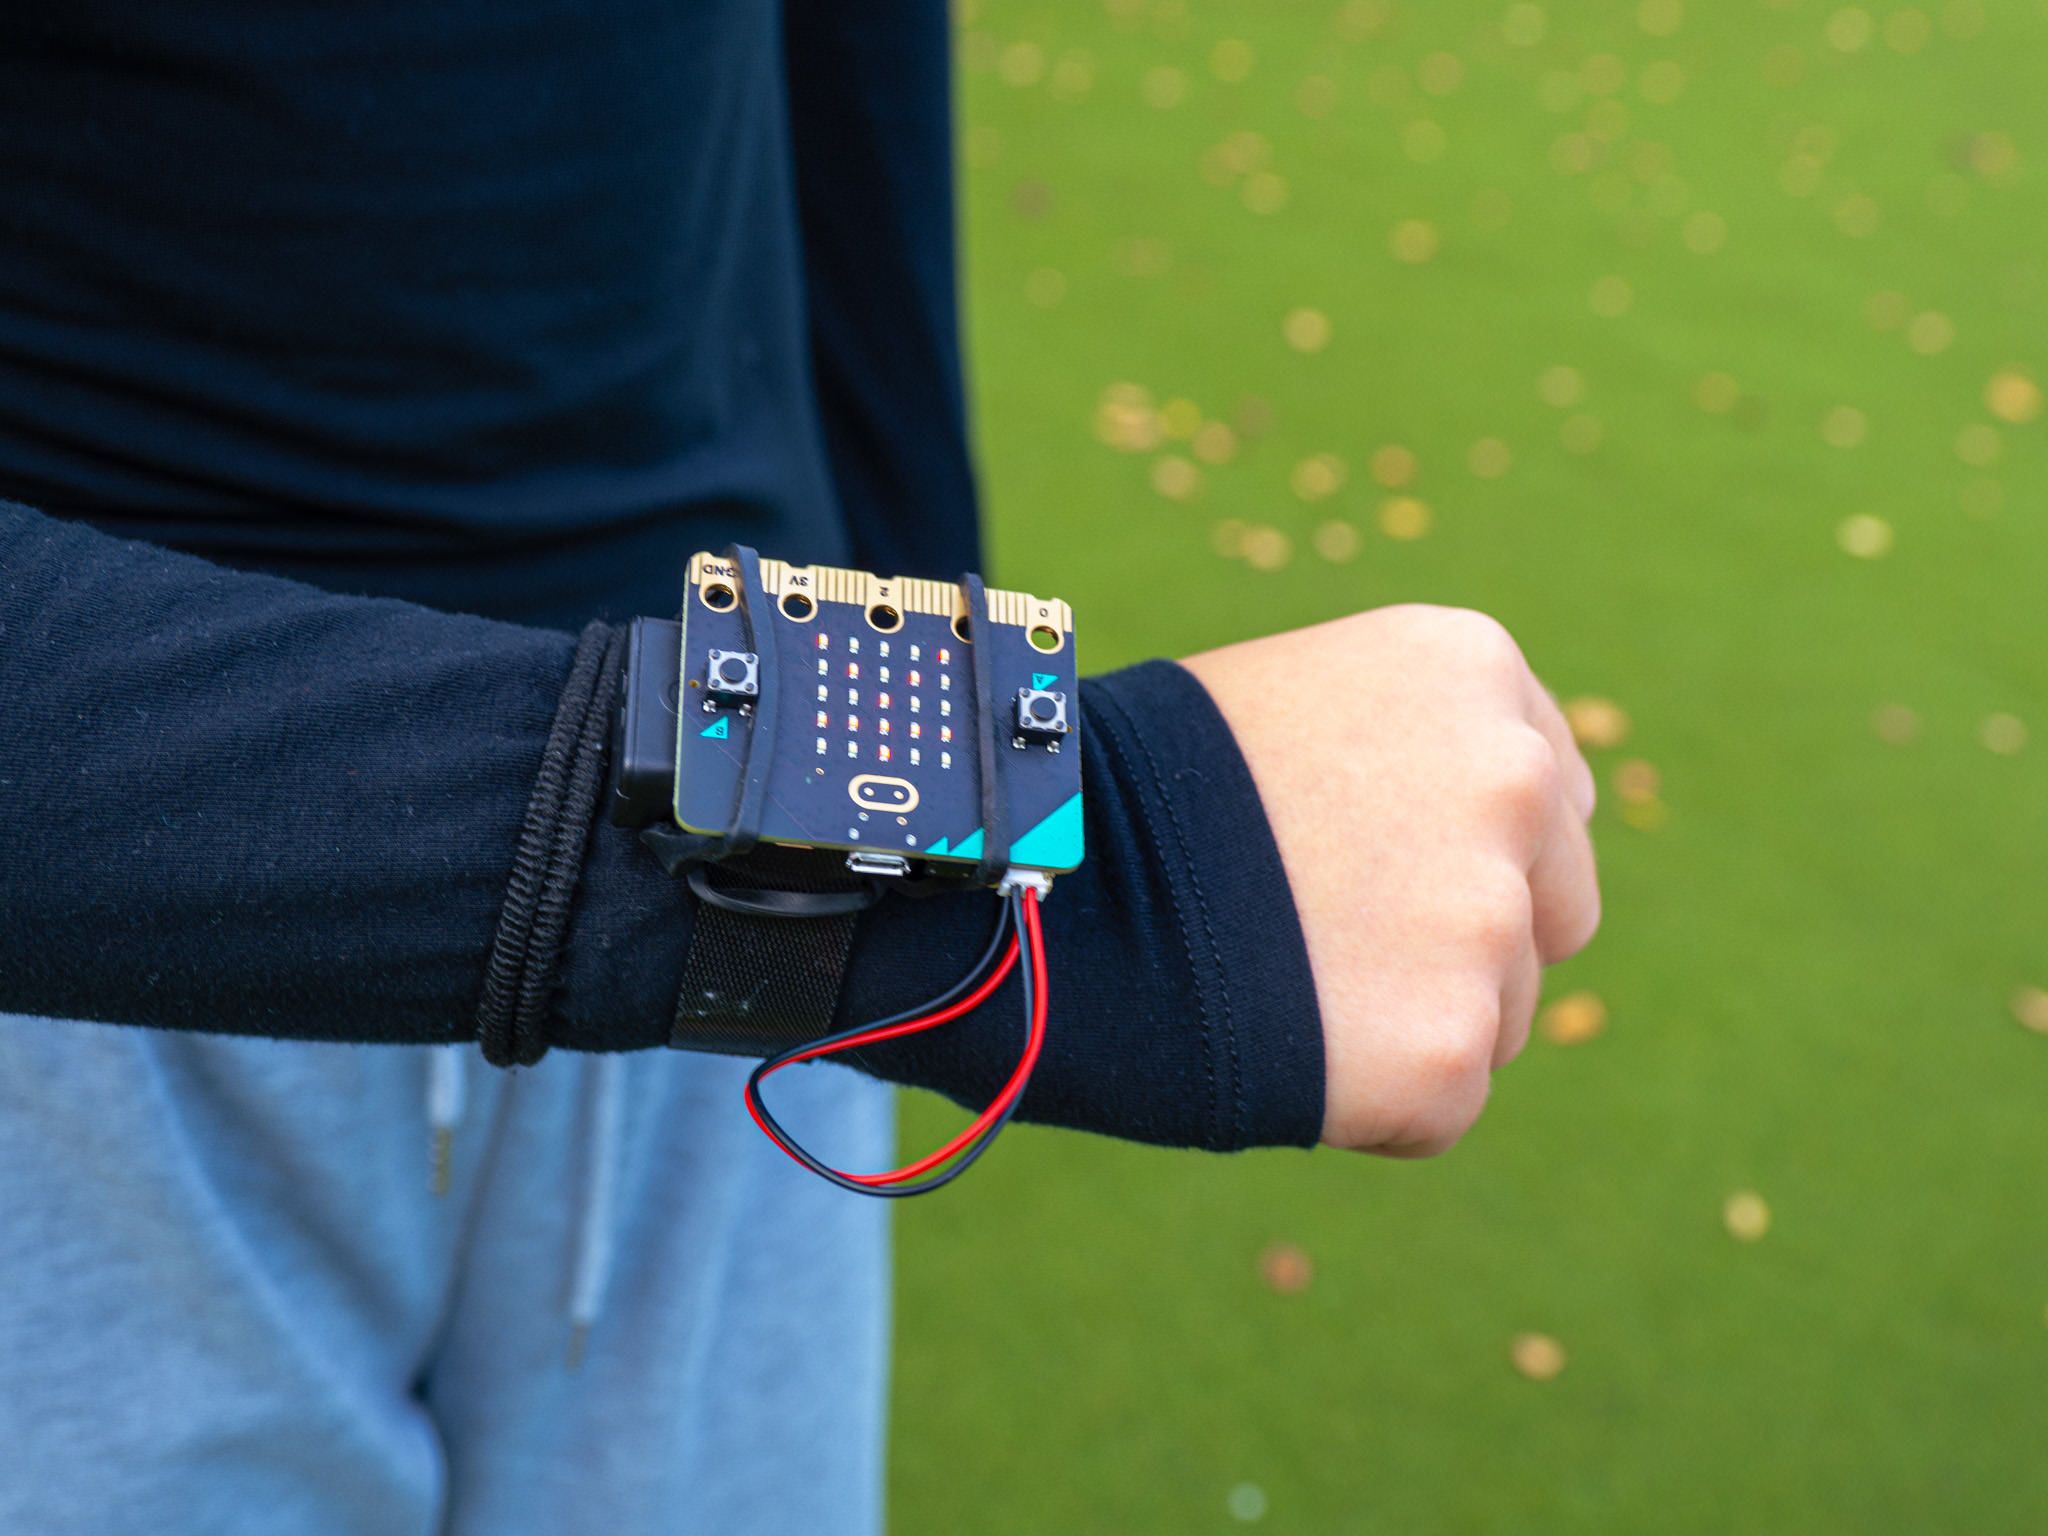
Hold your data collection micro:bit in your hand, or attach it to something that will move, like your wrist or ankle. You can use our wearable or see our guide for attaching micro:bits using other materials.

Step 2: Choose your movements
Decide on movements or actions that you want to train your ML model to recognise, like clapping, waving, running or jumping.
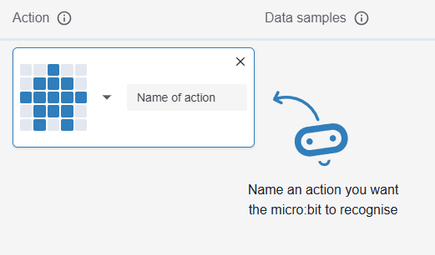
Step 3: Name your first action
Actions are the different types of movements you want to train the ML model to recognise, like waving and clapping.
Name your first action. You can also change the icon.
Step 4: Record data samples
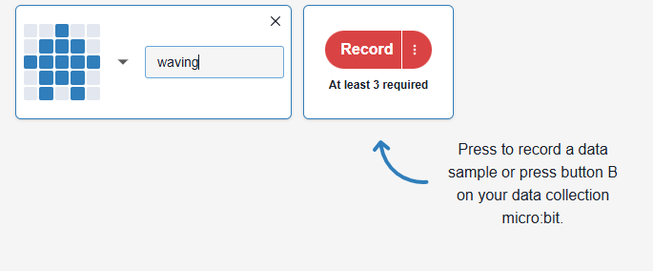
Press the ‘Record’ button, or press button B on the micro:bit, to record data samples of your movement. Each sample lasts 1 second.
Tip: It’s a good idea to start moving as soon as you press record.
Step 5: Record more data samples
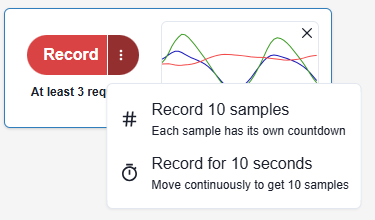
You need at least 3 data samples for each action to train the model, but ML models usually work better with more data.

Tip: You can record 10 data samples one after the other or record 10 seconds of data to get 10 samples using the three dots on the record button.
Step 6: Check your data quality
Check your data quality. Use a process of data cleaning and remove any data you think might be bad (data outliers) and record more samples if you need to.

Step 7: Repeat for more actions
Use the ‘Add action’ button to create more actions. Collect data for each one. You need at least 2 actions to train the ML model.
When you have enough actions and data, you are ready to train your ML model.

Train and test your ML model
When you have enough actions and data, the ‘Train model’ button will become active. Press the ‘Train model’ button and you're ready to test your model.
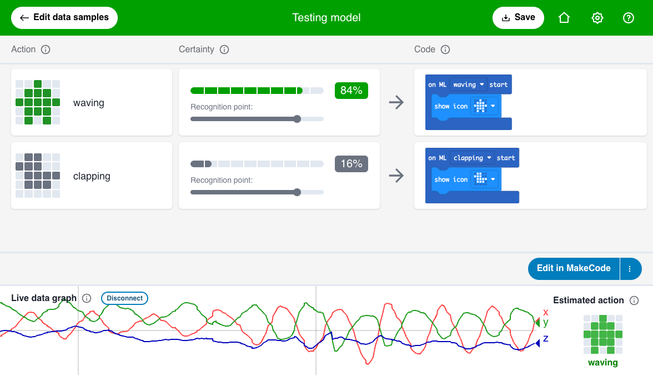
Try each action by moving your data collection micro:bit. Does the model correctly recognise each action?
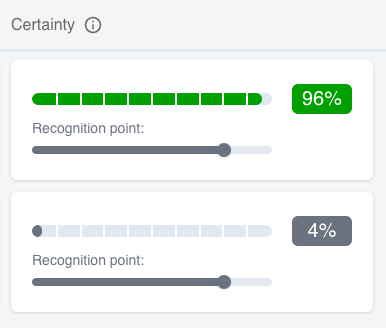
Certainty
The certainty shows how certain or confident the ML model is that you are doing that movement. The higher the percentage, the more confident it is.
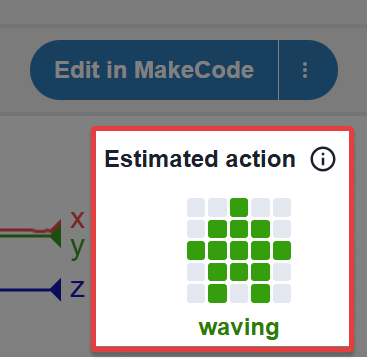
Estimated action
The estimated action is what the model recognises as the current movement you are making.
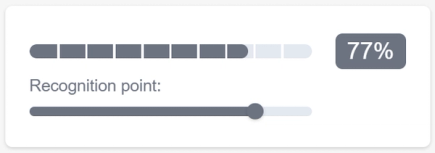
Recognition point
The confidence threshold for CreateAI to decide you are doing a particular action. You can adjust the recognition point to see how it changes the way the model recognises your movements.
Improve the ML model
If your model is not recognising actions as well as you expected, you’ll need to improve it.
- Try adding an action for ‘still’ or ‘other’ that includes being still and anything else that shouldn’t count as your actions.
- Collect samples in different orientations or keep the micro:bit in a fixed orientation. You may also need to record samples of being ‘still’ in different positions.
- Record more data samples, or collect them from more people who may do the same actions in different ways.
- Some actions might have movement data that’s too similar. Try actions that have obvious differences, like clapping and waving or walking and jumping.
The iterative process of improving the model mirrors how larger AI systems are developed and allows students to experience first-hand how ML models are only as good as their training data. Data must be collected, labelled, tested and improved by humans.
When you are confident that your model is working, try using your ML model in MakeCode to create your own projects.
Code with the model
Now you have a working ML model that recognises different movements correctly, you can use your model in MakeCode and run it on your micro:bit V2 away from a computer.
Select the ‘Edit in MakeCode’ button. You’ll see ML blocks that represent the actions you created in your model. You can change the action for each ML block and add your own code.

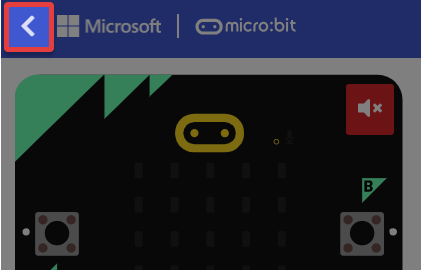
Note: If you want to edit your data, add more actions or retrain your model, select the back arrow to go back to micro:bit CreateAI.
Download ML model and code
When you are ready, download your project and your ML model to your micro:bit V2. Press 'Download' and follow the instructions on screen.
You can now use your micro:bit CreateAI project and your ML model away from your computer.
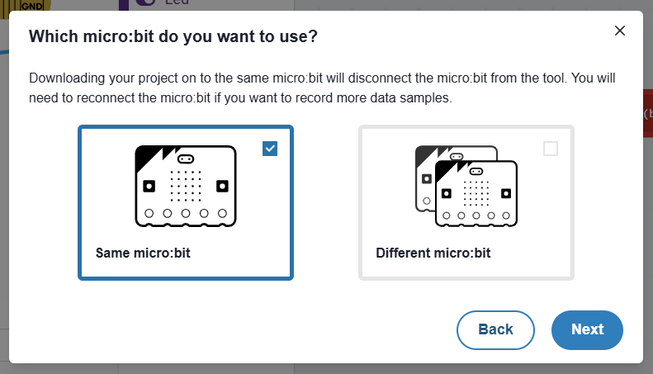
Note: If you don’t have a spare micro:bit, you can download the project to your data collection micro:bit. Downloading your project onto the micro:bit you used for data collection will disconnect it from micro:bit CreateAI. You will need to reconnect the micro:bit if you want to record more data samples.
MakeCode ML blocks
micro:bit CreateAI projects can use a selection of ML blocks that work with your ML model. Find them in the ‘Machine Learning’ category at the top of the toolbox.
on ML … start
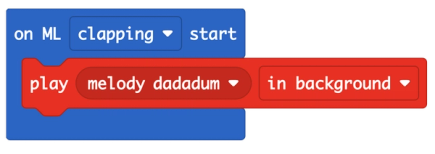
This block runs when the ML model estimates that an action has started.
The ML model updates its estimated action several times a second, but this block only runs when the estimated action changes.
The ‘unknown’ option represents the case where the ML model estimates no action has a certainty above the recognition point.
on ML … stop

This block runs when the ML model estimates that the current action has stopped.
When the estimated action changes, the stop block for that action will run, followed by the start block for the next action.
You can also use the stop block that provides the action’s duration. The duration is the number of milliseconds since this action became the estimated action. You can drag the duration into your code, for example to display it or update a variable to keep a running total.
is ML … detected
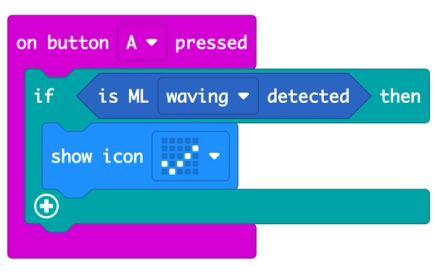
This block checks if an ML action is the estimated action.
This block compares the latest value of the estimated action to the action you select. Use the Boolean value to make logical decisions in your program.
Some programs will be easier to write using the ‘on ML start’ or ‘on ML stop‘ blocks instead.
certainty (%) ML …

The certainty percentage for an ML action.
The ML model runs several times a second and calculates a certainty value for each action. The estimated action is the action with the highest certainty. An action cannot be the estimated action when its certainty is below the recognition point. Some programs may need to use the certainty values directly, for example to display or log them. Most programs can use the estimated action instead of certainty values.
The certainty is expressed as a number from 0 to 100, representing the ML model’s certainty that this is the action being performed. The certainty for the ‘unknown’ action is always 0.
MakeCode simulator
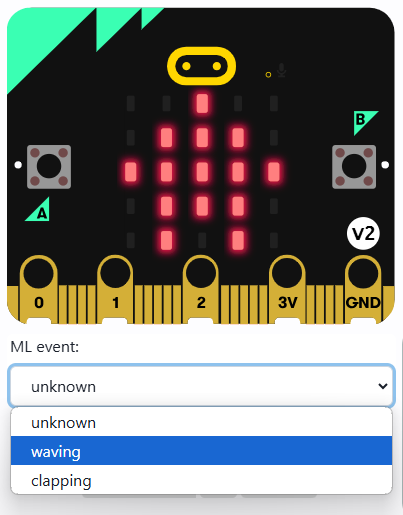
You can test your ML code using the simulator in MakeCode. Select the action you want to trigger using the ‘ML event’ menu. Once you are happy with your code, download your project to a micro:bit and test it for real.
Note: MakeCode is not connected to your micro:bit and the simulator won’t react to your micro:bit movements like it does in micro:bit CreateAI.
Saving and loading your project
Saving your project
micro:bit CreateAI will automatically store your project in your browser while you are working on it. If you want to work on your project at a later time, you have to save it to a HEX file.
Saving your project will create a HEX file which contains:
- all your recorded data
- your ML model
- and any coding you have done in MakeCode
You can save your project in CreateAI or in MakeCode:
- in CreateAI, use the 'Save' button in the toolbar
- in MakeCode, use the three dots on the Download button to access the option to ‘Download as File’
Name your project and save it on your computer or in a shared space.
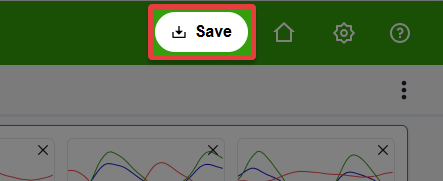
micro:bit CreateAI save button
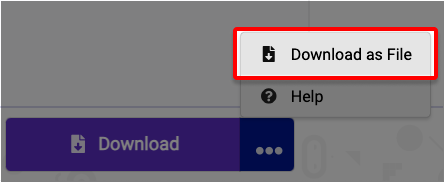
MakeCode download as file button
Tip: Saving a project might be useful if:
- you have not completed your project and want to work on it another time
- you are creating a project you want to use with a class or group, and you want to share it with them
- you are working across different computers or laptops, for example in a school setting
Loading your project
To open a saved HEX file, use the ‘Continue a saved session’ button on the ‘New session’ page in micro:bit CreateAI. This will let you browse and open a file saved to your device. Alternatively, drag and drop your file onto micro:bit CreateAI and the project will open automatically.
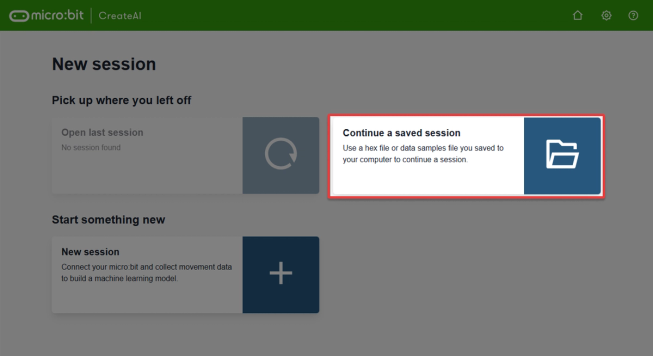
Advanced features
Data features
This experimental feature allows expert users to view data samples in a different way. Each time the model is trained, your movement data is organised using different statistical techniques such as averages and range. We call these ‘data features.’

The data features view allows you to see in more detail how your data is presented to the ML model. Move your mouse pointer over the stripes to discover which features are being used.
This view may allow you to improve your training data by spotting data outliers, or samples from different actions that look different in the graph view but may look similar to the computer when the ML model when trained.
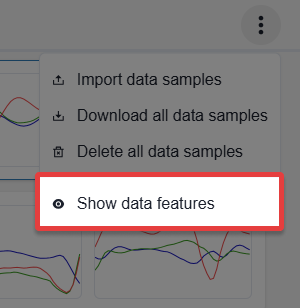
You can enable this view by clicking on ‘Show data features’ in the menu.
Discover more about CreateAI

Start using the free, web-based tool for teaching AI

Start using the free, web-based tool for teaching AI
Projects and other resources to get you started

Projects and other resources to get you started
Tips for using CreateAI in your classroom

Tips for using CreateAI in your classroom