第 1 步:制作
它是什么?
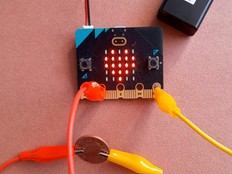
使用两个BBC micro:bit来测量声音强度,这个装置是用来测量不同隔音材料的特性。
介绍
编程指南
在这个项目中,您将使用计算机技术将micro:bit转换成工具来帮助您进行科学实验。
它使用两个micro:bit 和一个音源来测试不同材料的隔音特性。 所以即使传感器被遮盖的时候您依然能够读取到噪声值,它通过无线电把测量噪声值传输给附近的另外一块micto:bit.
您可以将不同的代码下载到发射和接收的micro:bits模块, 或者您可以自行编程并且了解它在上面的编程视频中是如何工作的。
发射器 / 传感器
必须使用 micro:bit V2作为发射模块,并且作为传感器包裹在不同的隔音材料中。 它使用麦克风来测量声音水平,然后通过无线电发送测量值。
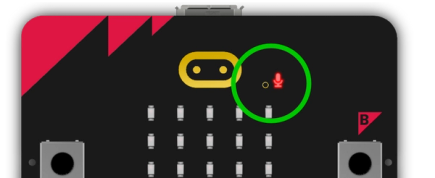
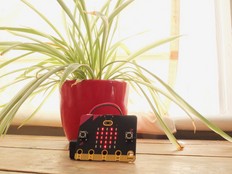
麦克风通过micro:bit正面的小孔感受声音。 务必让您想测试的东西不要触碰到这个小孔或者在它附近移动,不然会影响你的音量读数准确性。 将传感器micro:bit放在一个内衬有不同材料的纸板盒里,会更好地实现这点。
声源
将声源以固定距离放在传感器附近。 您可以选择任意东西作为声源,例如能发出恒定音量的乐器或者手机铃声。 我们在下文也提供了一个音频文件,您可以在手机或电脑上播放,来让它们作为声源。
为了确保测试有效,每次测试都应该让声源发出的声音的音量一样,并且与传感器的距离相同。
接收器
接收器micro:bit是您查看音量读数的地方。 你可以将它放在发射器几米范围内的任何地方。
开始实验
- 用你要测试的材料将发射器/传感器包起来。
- 每次测试之前,请按接收器micro:bit背面的重置按钮,将音量级别重设为0. 操作时保持绝对安静!
- 用您的声源发出声音。
- 点击接收器上的按钮A,在它的LED显示屏上查看音量。 音量大小会以0(最安静)到255(最吵闹)之间的数字显示。 这个数字显示的是,从您按下重置按钮后所测量到的最大音量。
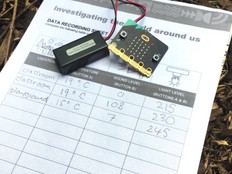
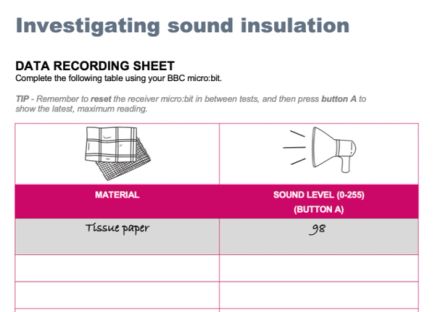
- 用我们下面提供的数据记录表或者其他任意一张纸,记录下测量到的音量。
- 用不同的材料包裹发射器/传感器,然后重复上面的实验步骤。
- 然后,通过分析您记录下的数据,得到“什么材料隔音最好”的结论。
所需材料
- 2个micro:bit主板. (发射器用的micro:bit必须是V2版本,而接收器用的micro:bit可以是V1版或V2版)
- 至少一个电池组(推荐给发射器用)
- 一个稳定的声源
- 用来测试的不同物质,例如泡沫、气泡膜、纸板和纸。 一个小纸板箱有助于某些实验步骤。
- 胶带或橡皮筋,用来将被测试材料固定到位。
- 一把尺子或者卷尺,用来测量声源和发射器之间的固定距离。
- 数据记录表或白纸,再来一支铅笔。
支持资源
数据记录表,用来记录您的每次测量;音频文件,用来在电话或电脑上播放从而充当声源。
第 2 步:编程
发射器 / 传感器
接收器
同在一个房间里进行实验
如果您要在同一个房间里进行多个实验,需要为每对micro:bit设置彼此不同的无线电组编号。 修改程序代码来改变无线电组编号。 您可以使用0到255之间的任意数字来作为无线电组编号,但需要确保每对micro:bit里的发射器/传感器和接收器的无线电组编号一样。