Fes un interruptor d'IA amb el micro:bit CreateAI que fa que el llum s'encengui quan piques de mans i s'apaga quan saludes.
Guia de projecte pas a pas
Pas 1: Entén-ho
Com funciona?
En aquest projecte entrenaràs un model de machine learning (ML) que reconegui quan estàs aplaudint i quan estàs saludant.
Combinaràs aquest model amb un programa de MakeCode que envia el senyal de ràdio "llums encesos" a una altra micro:bit quan aplaudeixes, i el senyal "llums apagats" quan saludes.
Quan el receptor de la micro:bit rep el senyal "llums encesos", s'encenen tots els LEDs. Quan rep el senyal "llums apagats", apaga els LEDs.
Què és l'aprenentatge automàtic?
L'aprenentatge automàtic (ML) és una mena d'intel·ligència artificial (IA) on els ordinadors poden aprendre i prendre decisions basades en dades.
Els humans entrenen els models de ML per ajudar-los a prendre aquestes decisions, per exemple, per reconèixer diferents "accions" quan moveu la vostra micro:bit de diferents maneres.
Què hauré de fer?
Els sistemes d'IA necessiten humans per dissenyar-los, construir-los, provar-los i utilitzar-los. Recolliràs dades per entrenar un model ML, el provaràs, el milloraràs i el combinaràs amb codi d'ordinador per fer un dispositiu intel·ligent que fa servir IA. Per fer-ho, utilitzareu una micro:bit i el lloc web micro:bit CreateAI.
Pas 2: Crea-ho
Què necessites
- Two micro:bit V2s, USB cable, one or two battery packs
- Un ordinador (p. ex., ordinador de sobretaula, portàtil o Chromebook) amb accés al lloc web micro:bit CreateAI, mitjançant un navegador web Chrome o Edge
- Si el teu ordinador no té Bluetooth habilitat, necessitaràs una micro:bit V2 addicional
- A strap and holder, or another way to attach the micro:bit to you (e.g. flexible craft stems or elastic bands)
- També pots trobar els nostres consells d'ensenyament de micro:bit CreateAI útils
Recollir mostres de dades
When you open the project in micro:bit CreateAI, you’ll see we’ve given you some data samples for ‘waving’, 'clapping’ and ‘still’ actions:
waving
clapping
still
You can add your own movement samples using the micro:bit's movement sensor or accelerometer.
A micro:bit CreateAI, fes clic al botó "Connecta" per connectar la teva recollida de dades micro:bit i segueix les instruccions.
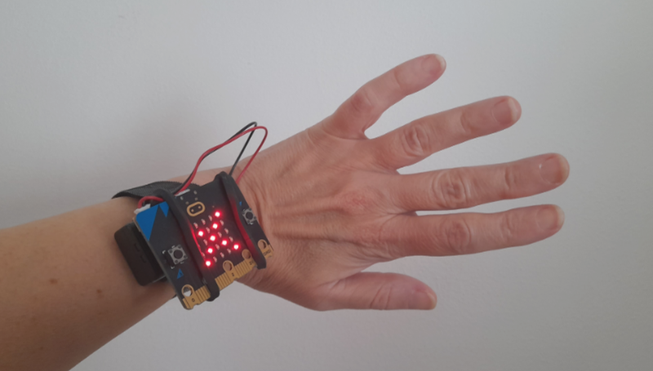
Attach the micro:bit to your wrist. Click on the first action, ‘waving’, and click 'Record'. Si comets un error, pots eliminar les mostres que no vulguis. També pots prémer el botó B de la micro:bit per començar a gravar.
If you would like to record continuously for 10 seconds to get 10 samples, click on the three dots next to the record button and select that option.
Now record your own data samples for the ‘clapping’ and 'still' actions, making sure for 'still' that you collect samples in different positions, such as facing up and down.
Entrena i prova el model
Click the ‘Train model’ button to train the model. Try clapping, waving and keeping still to see if those actions are estimated. Give your micro:bit to someone else to wear (making sure they put it on the same wrist and in the same orientation) and see if it works as well for them.
Millora el teu model
La majoria dels models es poden millorar amb més dades. If the model needs improving, click on ‘← Edit data samples’.
You can delete any data samples which you think don’t fit or add more samples.
Torna a entrenar el model i torna'l a provar.
Posa el model i el programa a la teva micro:bit
A micro:bit CreateAI, fes clic a "Edita a MakeCode" per veure el codi del projecte a l'editor MakeCode.
You can modify the code or just try it out as it is. Attach the first micro:bit using a USB cable, click on the ‘Download’ button in the MakeCode screen, and follow the instructions to transfer your AI model and the code blocks to it. Afterwards, download again onto another micro:bit.
Attach a battery pack to the sender micro:bit. You can keep the receiver micro:bit plugged into the computer or attach it to battery pack. Now wear the sender micro:bit and test it out.
Com funcionen els blocs de codi
When the program starts, the radio group is set to 52. Radio groups are like channels, so any micro:bit using the same group will get the message. Pots utilitzar el número que vulguis entre 0 i 255. If you are using this project in a class or coding club, you might like to encourage each pair or group of students to use a different radio group from others in the class.
The 'on ML... start' blocks are triggered when the sender micro:bit’s ML model decides you have started waving, clapping or being still.
If you are clapping, the ‘on ML clapping start’ block causes a tick icon to appear on the LED display of the sender micro:bit and the radio message ‘lightsOn’ to be sent to the receiver micro:bit. If you are waving, the ‘on ML waving start block’ causes a cross icon to appear on the LED display of the sender micro:bit and the radio message ‘lightsOff’ to be sent to the receiver micro:bit.
If you are still or the sender micro:bit can’t recognise your movements, the LED display is cleared and no radio message is sent.
The ’on radio received’ blocks turn on all the LEDs on the receiver micro:bit if a message is received saying ‘lightsOn’ and clear the screen if a message is received saying ‘lightsOff’.
The ‘on radio received lightsOn / lightsOff’ blocks are from a MakeCode extension called ‘Radio broadcast’. If you want to code this project yourself, you can find the blocks by clicking on ‘Extensions’ then choosing ‘Radio broadcast’.
Avaluació
How accurate is the light switch in turning on and off in response to your movements? How could you improve it, if needed?
How useful would this device be in real life? How does it compare to a regular light switch?
Pas 3: Estén-lo
- You could light up a room by putting the same code on multiple micro:bits. Keep the other micro:bits still while someone moves another to turn them all on or off.
- Add a fourth action which causes the receiver micro:bit to show dimmed lights. Use the ‘set brightness’ block, found in the LED section under ‘More’.
També et pot agradar
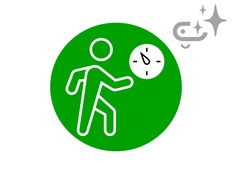
Crea un temporitzador d'exercici intel·ligent amb IA
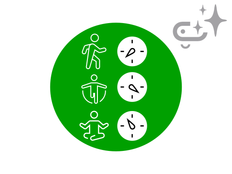
Utilitza la IA per detectar i programar activitats específiques
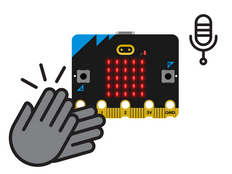
Controla els llums amb sons
This content is published under a Creative Commons Attribution-ShareAlike 4.0 International (CC BY-SA 4.0) licence.