Make an AI light switch with micro:bit CreateAI that makes a light turn on when you clap and turn off when you wave.
项目的逐步指南
第 1 步:理解
工作原理?
In this project, you’ll train a machine learning (ML) model to recognise when you’re clapping and waving.
You’ll combine that model with a MakeCode program that sends a ‘lightsOn’ radio signal to another micro:bit whenever you clap, and a ‘lightsOff’ radio signal whenever you wave.
When the receiver micro:bit receives the ‘lightsOn’ signal, all its LEDs light up. When it receives the ‘lightsOff’ signal, it clears its LED display.
什么是机器学习?
机器学习(machine learing,缩写ML是一种人工智能(artificial intelligence,缩写AI),让计算机从数据中学习并基于数据做出决策。
ML模型由人类训练,来帮助人类做决策,例如通过您移动micro:bit的差异来识别您当时做的是什么动作。
我需要做什么?
AI系统需要人类来设计、搭建、测试和使用。 You'll collect data to train an ML model, test it, improve it, and combine it with computer code to make a smart device that uses AI. 您将使用micro:bit和micro:bit Create AI网站来完成上面的工作。
第2步:制作
所需材料
- Two micro:bit V2s, USB cable, one or two battery packs
- 一台电脑(例如台式机,笔记本电脑或者Chromebook),必须能访问micro:bit CreateAI 网站,可以使用Chrome或者Edge网页浏览器
- 如果您的电脑没有自带蓝牙,您需要另外的一个V2版本的micro:bit。
- A strap and holder, or another way to attach the micro:bit to you (e.g. flexible craft stems or elastic bands)
- 您或许会从我们的micro:bit CreateAI 教学提示中获益
收集数据样本
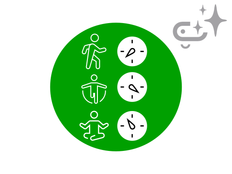
When you open the project in micro:bit CreateAI, you’ll see we’ve given you some data samples for ‘waving’, 'clapping’ and ‘still’ actions:
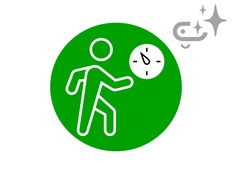
waving
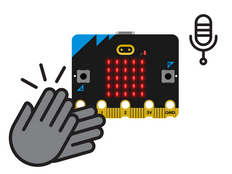
clapping
still
You can add your own movement samples using the micro:bit's movement sensor or accelerometer.
在micro:bit CreateAI中,点击“连接“按钮来连上您用来收集数据的micro:bit,然后按照说明来操作。
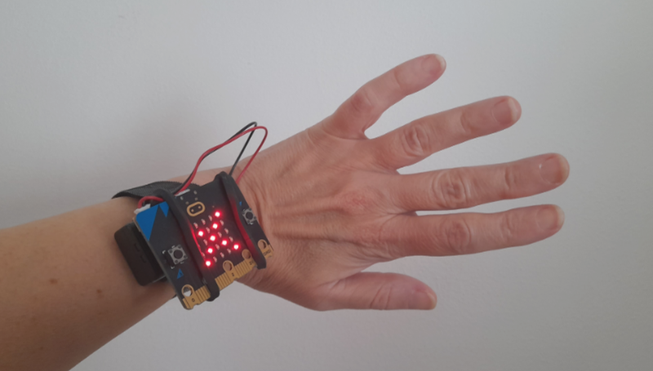
Attach the micro:bit to your wrist. Click on the first action, ‘waving’, and click 'Record'. 如果您搞错了什么,您可以删除您不想要的样本。 您也可以按下micro:bit的按钮B来启动录制。
If you would like to record continuously for 10 seconds to get 10 samples, click on the three dots next to the record button and select that option.
Now record your own data samples for the ‘clapping’ and 'still' actions, making sure for 'still' that you collect samples in different positions, such as facing up and down.
训练和测试模型
Click the ‘Train model’ button to train the model. Try clapping, waving and keeping still to see if those actions are estimated. Give your micro:bit to someone else to wear (making sure they put it on the same wrist and in the same orientation) and see if it works as well for them.
改良您的模型
绝大部分的模型可以通过给与更多数据来得到改进。 If the model needs improving, click on ‘← Edit data samples’.
You can delete any data samples which you think don’t fit or add more samples.
再次训练模型然后测试它。
将模型和代码传到您的micro:bit里
在micro:bit CreateAI里点击“在MakeCode中编辑”,从而在MakeCode编辑器里查看项目代码。
You can modify the code or just try it out as it is. Attach the first micro:bit using a USB cable, click on the ‘Download’ button in the MakeCode screen, and follow the instructions to transfer your AI model and the code blocks to it. Afterwards, download again onto another micro:bit.
Attach a battery pack to the sender micro:bit. You can keep the receiver micro:bit plugged into the computer or attach it to battery pack. Now wear the sender micro:bit and test it out.
代码块如何工作
When the program starts, the radio group is set to 52. Radio groups are like channels, so any micro:bit using the same group will get the message. 你可以在0-255之间选择任何你喜欢的组号。 If you are using this project in a class or coding club, you might like to encourage each pair or group of students to use a different radio group from others in the class.
The 'on ML... start' blocks are triggered when the sender micro:bit’s ML model decides you have started waving, clapping or being still.
If you are clapping, the ‘on ML clapping start’ block causes a tick icon to appear on the LED display of the sender micro:bit and the radio message ‘lightsOn’ to be sent to the receiver micro:bit. If you are waving, the ‘on ML waving start block’ causes a cross icon to appear on the LED display of the sender micro:bit and the radio message ‘lightsOff’ to be sent to the receiver micro:bit.
If you are still or the sender micro:bit can’t recognise your movements, the LED display is cleared and no radio message is sent.
The ’on radio received’ blocks turn on all the LEDs on the receiver micro:bit if a message is received saying ‘lightsOn’ and clear the screen if a message is received saying ‘lightsOff’.
The ‘on radio received lightsOn / lightsOff’ blocks are from a MakeCode extension called ‘Radio broadcast’. If you want to code this project yourself, you can find the blocks by clicking on ‘Extensions’ then choosing ‘Radio broadcast’.
评估
How accurate is the light switch in turning on and off in response to your movements? How could you improve it, if needed?
How useful would this device be in real life? How does it compare to a regular light switch?
第 3 步: 拓展
- You could light up a room by putting the same code on multiple micro:bits. Keep the other micro:bits still while someone moves another to turn them all on or off.
- Add a fourth action which causes the receiver micro:bit to show dimmed lights. Use the ‘set brightness’ block, found in the LED section under ‘More’.
This content is published under a Creative Commons Attribution-ShareAlike 4.0 International (CC BY-SA 4.0) licence.