Crie um interruptor de luz com IA com o micro:bit CreateAI que acenderá a luz quando você bater palmas e as apagará quando você acenar.
Guia do projeto passo a passo
Passo 1: Entender
Como funciona?
Neste projeto, você treinará um modelo de aprendizado de máquina (ML) para reconhecer quando você está batendo palmas e acenando.
Você combinará esse modelo com um programa MakeCode que envia um sinal de rádio "lightsOn" (acender luz) para outro micro:bit sempre que você bater palmas e um sinal de rádio "lightsOff" (apagar luz) sempre que você acenar.
Quando o micro:bit receptor recebe o sinal "lightsOn", todos os seus LEDs acendem. Ao receber o sinal "lightsOff", ele limpa sua tela de LED.
O que é aprendizado de máquina?
Aprendizado de máquina (ML ou Machine Learning) é um tipo de inteligência artificial (IA) onde os computadores podem aprender e tomar decisões com base em dados.
Os modelos de ML são treinados por humanos para ajudá-los a tomar essas decisões, por exemplo, reconhecer diferentes 'ações' quando você move seu micro:bit de maneiras diferentes.
O que eu precisarei fazer?
Os sistemas de IA precisam de humanos para projetá-los, construí-los, testá-los e usá-los. Você vai coletar dados para treinar um modelo de ML, testá-lo, aprimorá-lo e combiná-lo com código de computador para criar um dispositivo inteligente que utiliza IA. Você usará um micro:bit e o site micro:bit CreateAI para fazer isso.
Passo 2: Criação
Itens necessários:
- Dois micro:bit V2, cabo USB, um ou dois packs de pilhas.
- Um computador (por exemplo, desktop, laptop ou Chromebook) com acesso ao site micro:bit CreateAI, usando um navegador Chrome ou Edge
- Caso o seu computador não tenha Bluetooth ativado, você precisará de mais um micro:bit V2
- Uma alça e um suporte, ou outra maneira de prender o micro:bit a você (por exemplo, hastes flexíveis para artesanato ou elásticos)
- Você também pode achar nossas dicas de ensino do micro:bit CreateAI úteis
Colete amostras de dados
Ao abrir o projeto no micro:bit CreateAI, você verá que incluímos alguns exemplos de dados para as ações de "acenar", "bater palmas" e "ficar parado":
waving
clapping
still
Você pode adicionar suas próprias amostras de movimento usando o sensor de movimento ou o acelerômetro do micro:bit.
No micro:bit CreateAI, clique no botão 'Conectar' para conectar seu micro:bit de coleta de dados e siga as instruções.
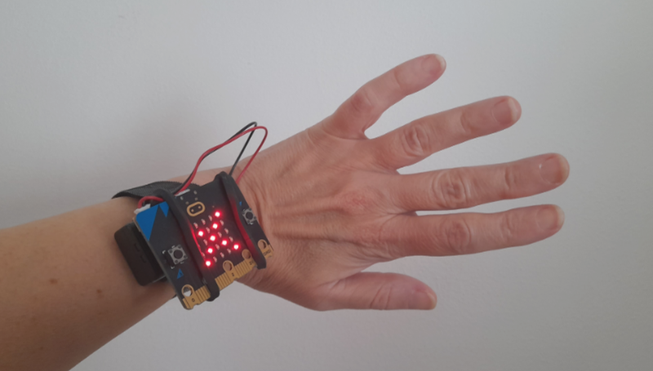
Prenda o micro:bit ao seu pulso. Clique na primeira ação, "acenar" e clique em "Gravar". Caso cometa um erro, você pode excluir as amostras que não desejar. Também é possível pressionar o botão B no micro:bit para começar a gravar.
Se você quiser gravar continuamente por 10 segundos para obter 10 amostras, clique nos três pontos ao lado do botão de registro e selecione essa opção.
Agora, registre suas próprias amostras de dados para as ações de "bater palmas" e "ficar parado", certificando-se de coletar amostras em diferentes posições para a ação de "ficar parado", como "olhando para cima" e "olhando para baixo".
Treine e teste o modelo
Clique no botão "Treinar modelo" para treinar o modelo. Experimente bater palmas, acenar e ficar parado para ver se essas ações são reconhecidas. Entregue seu micro:bit para outra pessoa usar (certificando-se de que ela o coloque no mesmo pulso e na mesma orientação) e veja se funciona tão bem para ela.
Aprimore seu modelo
A maioria dos modelos pode ser aprimorada com mais dados. Se o modelo precisar de melhorias, clique em ‘← Editar amostras de dados’.
Você pode excluir quaisquer amostras de dados que achar inadequadas, ou adicionar mais amostras.
Treine o modelo novamente e teste-o de novo.
Coloque o modelo e o código no seu micro:bit
No micro:bit CreateAI, clique em "Editar no MakeCode" para ver o código do projeto no editor MakeCode.
Você pode modificar o código ou apenas testá-lo como está. Conecte o primeiro micro:bit usando um cabo USB, clique no botão "Download" na tela do MakeCode e siga as instruções para transferir seu modelo de IA e os blocos de programação para ele. Depois, faça o download novamente para outro micro:bit.
Conecte um pack de pilhas ao micro:bit transmissor. Você pode manter o micro:bit receptor conectado ao computador ou conectá-lo a um pack de pilhas. Agora vista o micro:bit transmissor e teste-o.
Como funcionam os blocos de código
Quando o programa começa, o grupo de rádio é sintonizado em 52. Os grupos de rádio são como canais, portanto, qualquer micro:bit que utilize o mesmo grupo receberá a mensagem. É possível escolher qualquer número de grupo entre 0 e 255; Se você estiver usando este projeto em uma aula ou clube de programação, talvez queira incentivar cada dupla ou grupo de alunos a usar um grupo de rádio diferente dos demais da turma.
Os blocos "on ML... start" são acionados quando o modelo de aprendizado de máquina (ML) do micro:bit transmissor determina que você começou a acenar, bater palmas ou ficar parado.
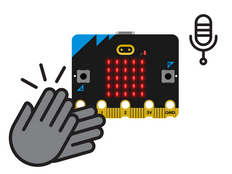
Se você estiver batendo palmas, o bloco ‘on ML clapping start’ faz aparecer um ícone de um tique na tela de LEDs do micro:bit transmissor e envia a mensagem de rádio "lightsOn" para o micro:bit receptor. Se você estiver acenando, o bloco "on ML waving start" faz aparecer um ícone de cruz na tela de LED do micro:bit transmissor e envia a mensagem de rádio "lightsOff" para o micro:bit receptor.
Se você estiver parado ou se o micro:bit transmissor não conseguir reconhecer seus movimentos, a tela de LEDs é apagado e nenhuma mensagem de rádio será enviada.
Os blocos "on radio received" acendem todos os LEDs no micro:bit receptor se for recebida uma mensagem dizendo "lightsOn" e apagam a tela se for recebida uma mensagem dizendo "lightsOff".
Os blocos "on radio received lightsOn / lightsOff" vêm de uma extensão do MakeCode chamada "Radio broadcast" (transmissão de rádio). Se quiser programar este projeto por conta própria, poderá encontrar os blocos clicando em "Extensões" e selecionando "Transmissão de rádio".
Avaliação
Quão preciso é o interruptor de luz ao ligar e desligar em resposta aos seus movimentos? Como você poderia melhorá-lo, se necessário?
Quão útil seria este dispositivo na vida real? Como ele se compara a um interruptor de luz comum?
Passo 3: Melhorias
- Você poderia iluminar uma sala colocando o mesmo programa em vários micro:bits. Mantenha os outros micro:bits imóveis enquanto alguém move outro para ligar ou desligar todos.
- Adicione uma quarta ação que faça o micro:bit receptor mostrar luzes esmaecidas. Use o bloco "set brightness" (ajustar brilho), encontrado na seção de LEDs em "Mais".
Você pode gostar de
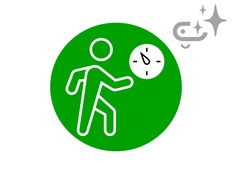
Crie um temporizador de exercícios inteligente usando IA
Use a IA para detectar e cronometrar atividades específicas
Controlar lâmpadas por som
This content is published under a Creative Commons Attribution-ShareAlike 4.0 International (CC BY-SA 4.0) licence.