micro:bit CreateAI を使用して、手をたたくとライトがつき、手を振るとライトが消える、AI ライトスイッチを作ります。
やさしいプロジェクトガイド
ステップ 1: 理解する
仕組み
このプロジェクトでは、手をたたいたり振っったりしたことを認識する機械学習 (ML) モデルをトレーニングします。
このモデルを、手をたたくたびに「lightsOn」無線シグナルを別の micro:bit に送信し、手を振るたびに「lightsOff」無線シグナルを送信する MakeCode プログラムと組み合わせます。
受信側の micro:bit が「lightsOn」シグナルを受信すると、すべての LED が点灯します。 「lightsOff」シグナルを受信すると、LED ディスプレイの表示が消えます。
機械学習とは何ですか?
機械学習 (ML) は、コンピュータがデータに基づいて学習し、意思決定できる人工知能 (AI)の一種です。
ML モデルは、たとえば micro:bit をさまざまな方法で動かしたときに、さまざまな「アクション」を認識するなど、決定を下すのに役立つよう人がトレーニングします。
必要なこと
AIシステムは、人間が設計し、組み立て、テストしてから使う必要があります。 データを集めてMLモデルを訓練・テスト・改善し、コンピュータプログラムと組み合わせてAIを利用したスマートデバイスを作りましょう。 これを行うには、micro:bit と micro:bit CreateAI のWebサイトを使います。
ステップ2: プログラムする
必要なもの
- 2台のmicro:bit V2、USBケーブル、1つまたは2つのバッテリーパック
- ChromeまたはEdgeウェブブラウザを使用して、micro:bit作成AIのウェブサイトにアクセスできるコンピューター(デスクトップ、ラップトップ、またはChromebookなど)
- コンピュータにBluetoothが搭載されていない場合は、micro:bit V2が別途必要になります。
- ストラップとホルダー、またはmicro:bitを自分に装着するための別のもの(やわらかい手芸用の棒やゴムバンドなど)
- micro:bit CreateAIを指導するヒントも役立つかもしれません
データサンプルの収集
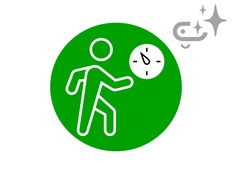
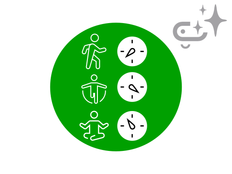
micro:bitのCreateAIでプロジェクトを開くと、「手を振る」、「拍手」、「静止」アクションのデータサンプルがいくつか表示されます。
waving
clapping
still
micro:bitの運動センサーまたは加速度センサーを使って、独自の運動のサンプルを追加できます。
micro:bit CreateAI で、「接続」(Connect)ボタンをクリックして、データ収集用micro:bitを接続して指示にしたがいます。
micro:bitを手首に装着します。 最初のアクションである「手を振る」をクリックし、「記録」をクリックします。 間違えた場合は、不要なサンプルを削除できます。 micro:bit のボタン B を押して記録を開始することもできます。
10秒間連続で記録して10個のサンプルを取得したい場合は、記録ボタンの横にある三点リーダーをクリックし、当該オプションを選択します。
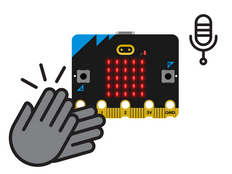
次に、「拍手」と「静止」アクションの独自のデータサンプルを記録します。特に「静止」については、上向きや下向きなど、異なる姿勢でサンプルを収集するようにしてください。
モデルのトレーニングとテスト
「モデルを訓練」ボタンをクリックしてモデルを訓練します。 拍手、手を振る、静止といったアクションが推測されるか試してみましょう。micro:bitを他の人に装着してもらい(同じ手首に同じ向きで装着することを確認してください)、同様に動作するか確認します。
モデルの改善
ほとんどのモデルは、より多くのデータを学習させることで精度を上げることができます。 モデルの改善が必要な場合には、「← データサンプルを編集」をクリックします。
不適合と思われるデータサンプルを削除したり、さらにサンプルを追加したりできます。
モデルを再度トレーニングし、再度テストします。
モデルとプログラムをmicro:bitに入れる
micro:bit CreateAI で、「MakeCode で編集」(Edit in MakeCode)をクリックすると、MakeCode エディターでプロジェクトのプログラムが表示されます。
プログラムを修正してもいいですし、そのままで試すこともできます。 USBケーブルで最初のmicro:bitを接続し、MakeCode画面の 「ダウンロード」ボタンをクリックして、指示に従ってAIモデルとコードブロックをmicro:bitに転送します。 その後、別のmicro:bitに再度ダウンロードします。
送信側micro:bitにバッテリーパックを取り付けます。 受信側micro:bitはコンピュータに接続したままにしておくか、バッテリーパックに接続します。 送信側micro:bitを装着してテストしてみましょう。
プログラムの仕組み
プログラムが開始されると、無線グループは52に設定されます。 無線グループはチャンネルのようなもので、同じグループを使っているmicro:bitがメッセージを受け取ります。 0から255の好きなグループ番号を使用できます。 このプロジェクトを授業やプログラミングクラブで利用する場合、各ペアまたはグループがクラス内の他のグループとは違う無線グループを使用するよう呼びかけると良いでしょう。
「on ML... start」ブロックは、手を振り始めたり、拍手を始めたり、静止状態を開始したと送信側micro:bitのMLモデルが判断したときにトリガーされます。
拍手している場合、「on ML clapping start」ブロックにより、送信側micro:bitのLEDディスプレイにチェックマークが表示され、受信側micro:bitに無線メッセージ「lightsOn」が送信されます。 手を振っている場合、「on ML waving start」ブロックにより、送信側micro:bitのLEDディスプレイにバツ印が表示され、受信側micro:bitに無線メッセージ「lightsOff」が送信されます。
静止している場合、または送信側micro:bitが運動を認識できない場合、LEDディスプレイは表示が消え、無線メッセージは送信されません。
「on radio received」ブロックは、メッセージ「lightsOn」を受信した場合はmicro:bitの全LEDを点灯させ、メッセージ「lightsOff」を受信した場合は画面を消します。
「on radio received lightsOn / lightsOff」ブロックは、「Radio Broadcast」というMakeCode拡張機能からのものです。 このプロジェクトを自分でプログラミングしたい場合は、「拡張機能」をクリックし、「Radio broadcast」を選択するとブロックが見つかります。
評価
動きに応じてライトのスイッチが切り替わる精度はどうですか? 必要に応じて、どのように改善できそうですか?
この装置は実際の生活の中でどのくらい役立ちそうですか? 通常のライトスイッチと比べるとどうですか?
ステップ 3: 拡張する
- 同じプログラムを複数のmicro:bitに読み込むことで、部屋の明かりを点灯できます。 誰かが別のmicro:bitを動かして電源を入れたり切ったりしているときは、もう一方のmicro:bitは動かさないようにしましょう。
- 受信側micro:bitのライトが暗くなる、4つ目のアクションを追加しましょう。 「その他」の「LED」セクションにある「set brightness」ブロックを使用します。
こちらもおすすめ
This content is published under a Creative Commons Attribution-ShareAlike 4.0 International (CC BY-SA 4.0) licence.